通过 SSH 远程使用 Notebook
本教程演示如何通过 SSH 连接远程使用 Notebook。
准备
- 创建了一个启用 SSH 选项的 Notebook。
- 确认该 Notebook 处于正常运行状态。
端口转发
命令行工具 t9k-pf
命令行工具 t9k-pf 的功能类似于 kubectl port-forward,可以让用户能够在本地通过端口转发的方式访问 TensorStack AI 平台的各种资源。
请参照用户指南,下载安装 t9k-pf 并配置身份认证和授权。
端口转发命令
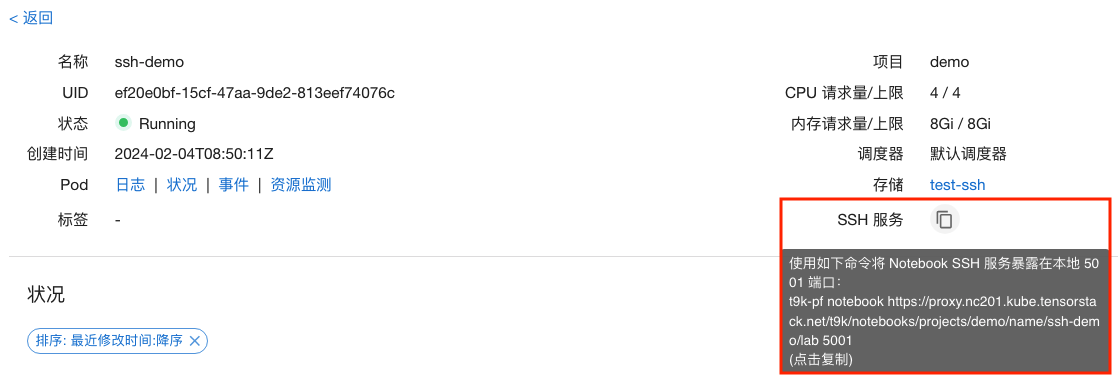
在 Notebook 详情页面,查看并复制SSH 服务提示的命令:
在终端执行该命令以进行端口转发:
$ t9k-pf notebook <URL> <Port>
now you can forward to your target by 127.0.0.1:<Port>
参数说明如下:
URL:Notebook 的 Web UI 地址。除上述获取方式外,你也可以在打开 Notebook 后,复制浏览器地址栏中的地址作为URL参数使用。Port:转发的本地端口。在 SSH 远程连接教程中会使用到该端口。
根据终端打印的提示信息,使用本地的端口与目标 Notebook 建立 SSH 连接,具体命令请参阅 SSH 远程连接。
建立 SSH 连接
使用终端
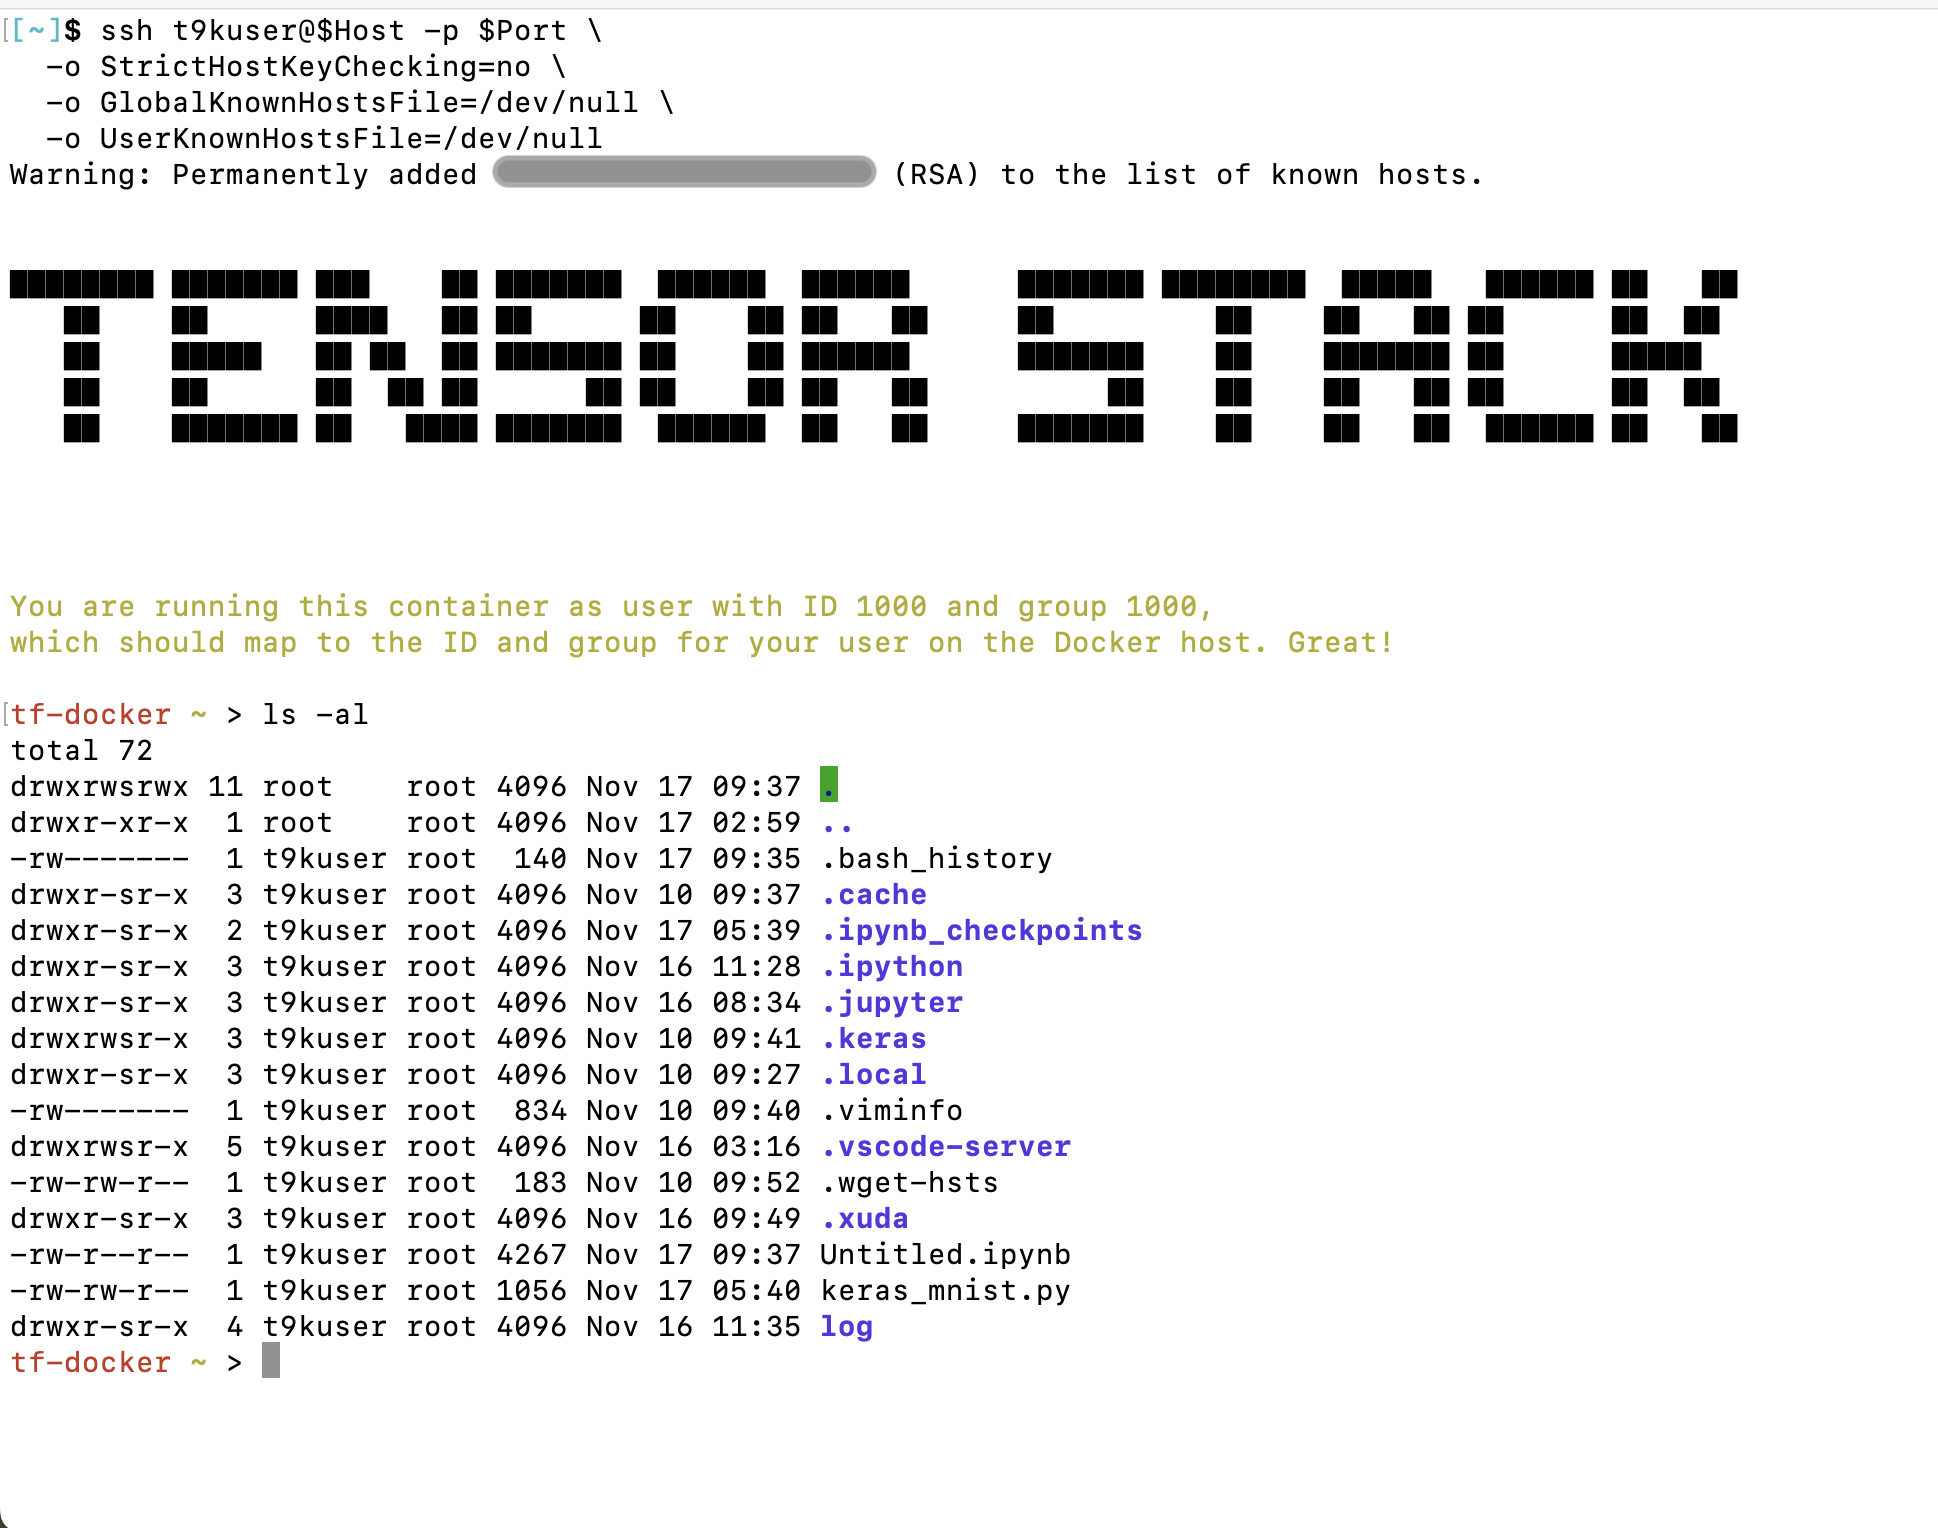
在终端中运行以下命令以连接到 Notebook:
ssh t9kuser@localhost -p <Port> \
  -o StrictHostKeyChecking=no \
  -o GlobalKnownHostsFile=/dev/null \
  -o UserKnownHostsFile=/dev/null
然后在终端中操作 Notebook:
使用 VSCode
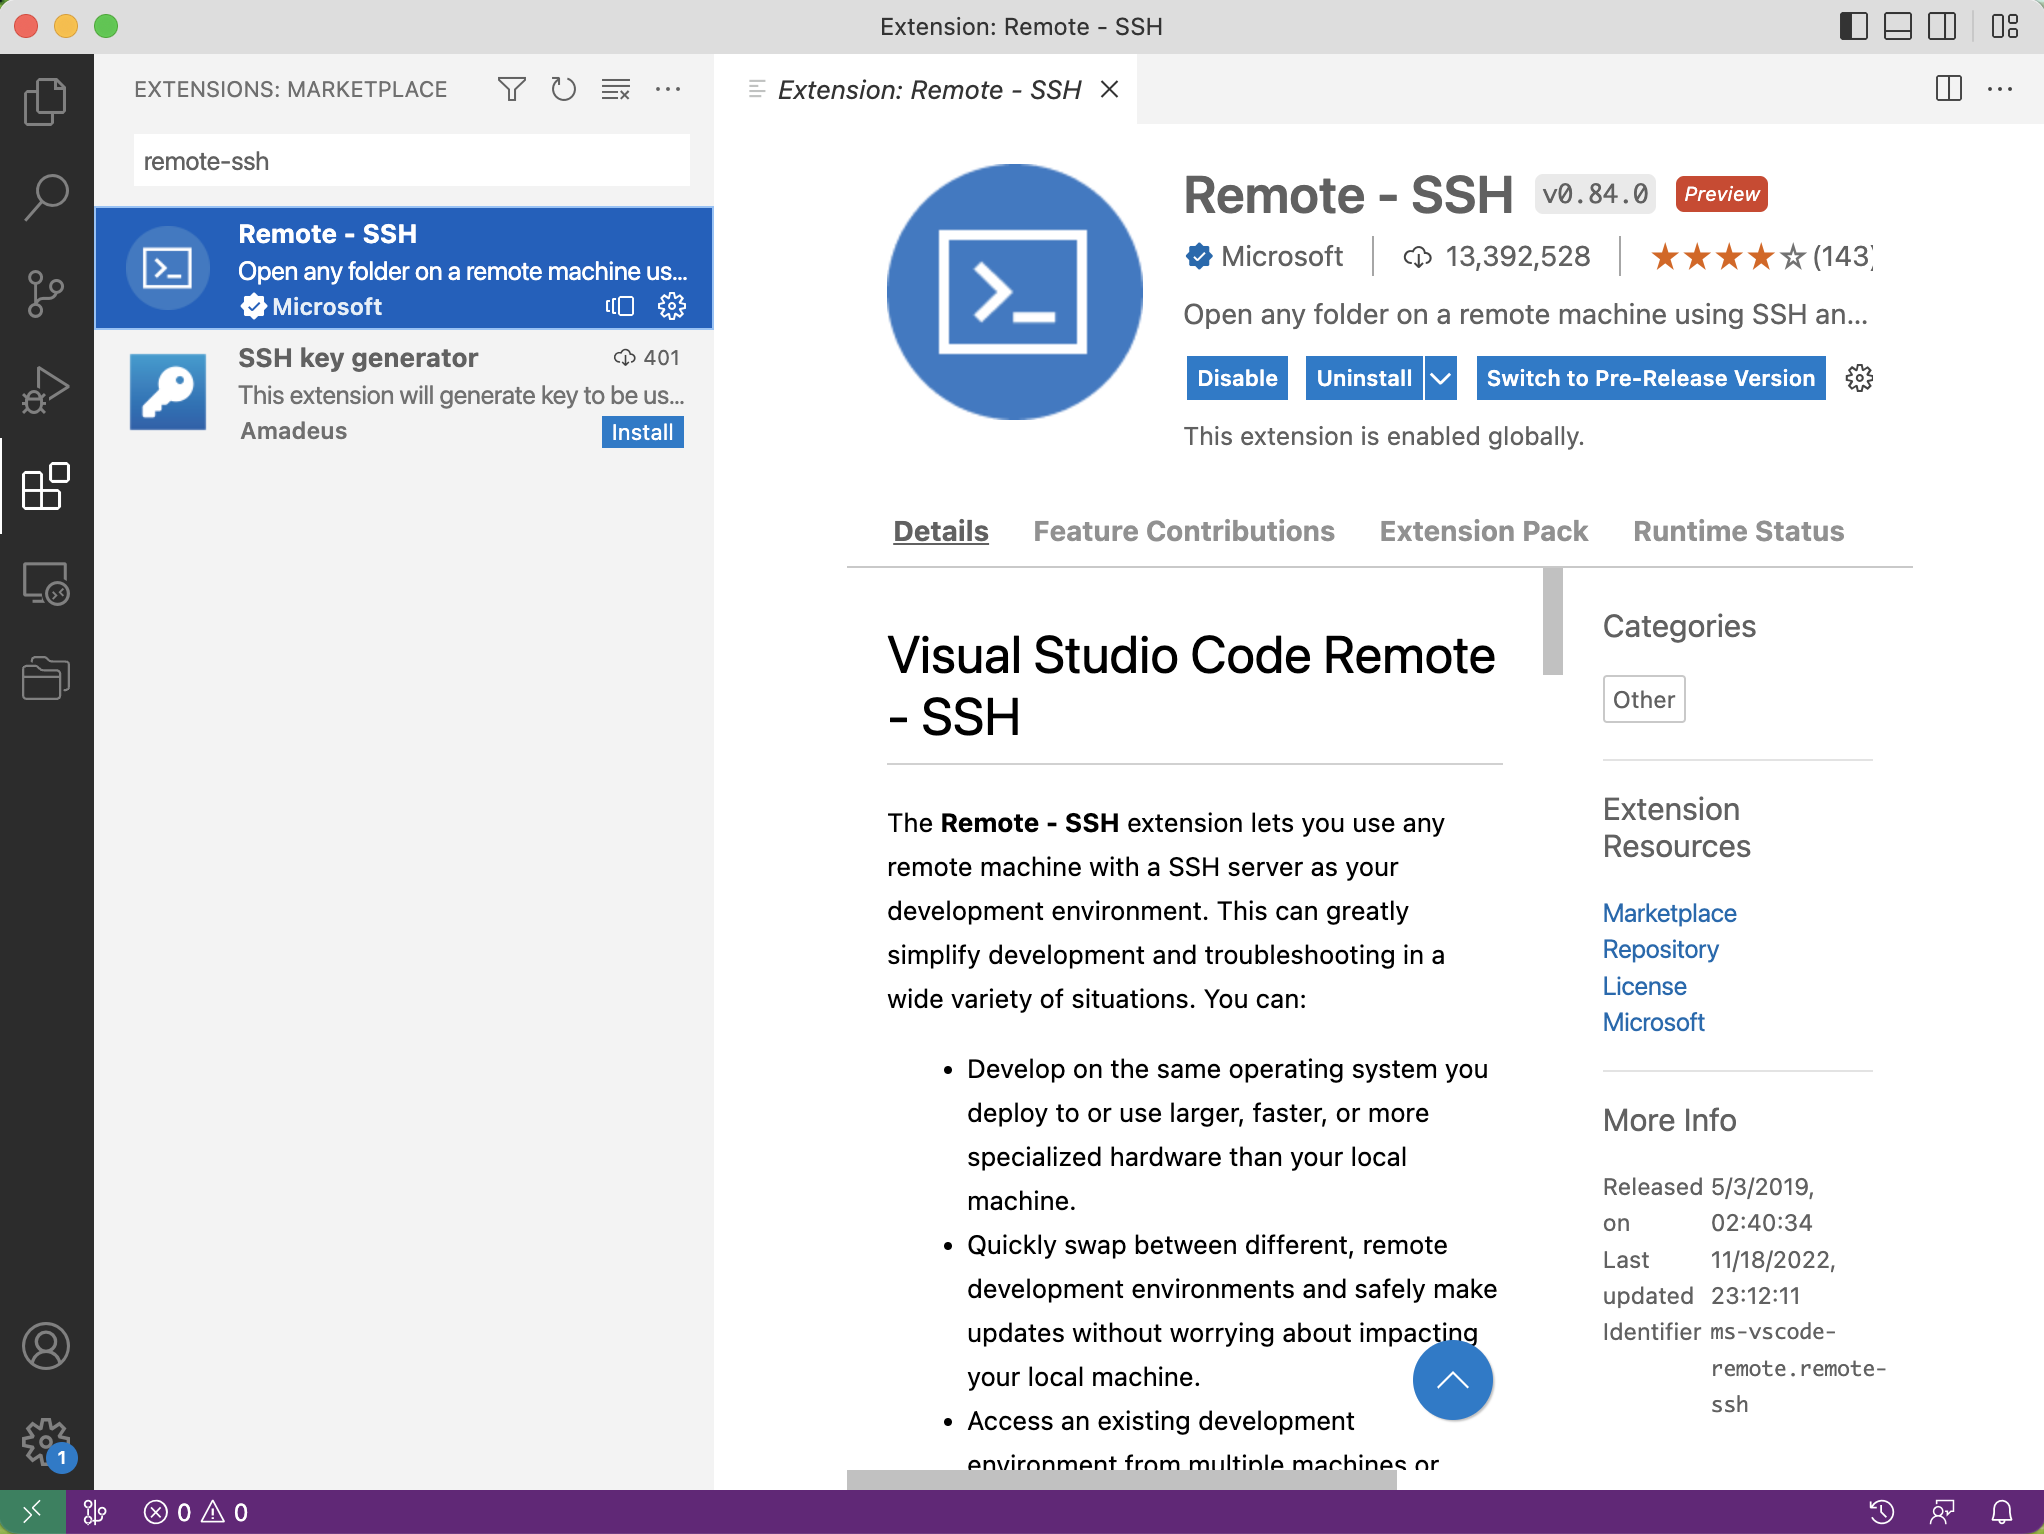
安装 Remote SSH 插件
在 VSCode 中搜索 Remote - SSH 插件并安装:
添加 SSH Config
安装完成后,需要在 SSH Config 中添加主机(Notebook)的信息。
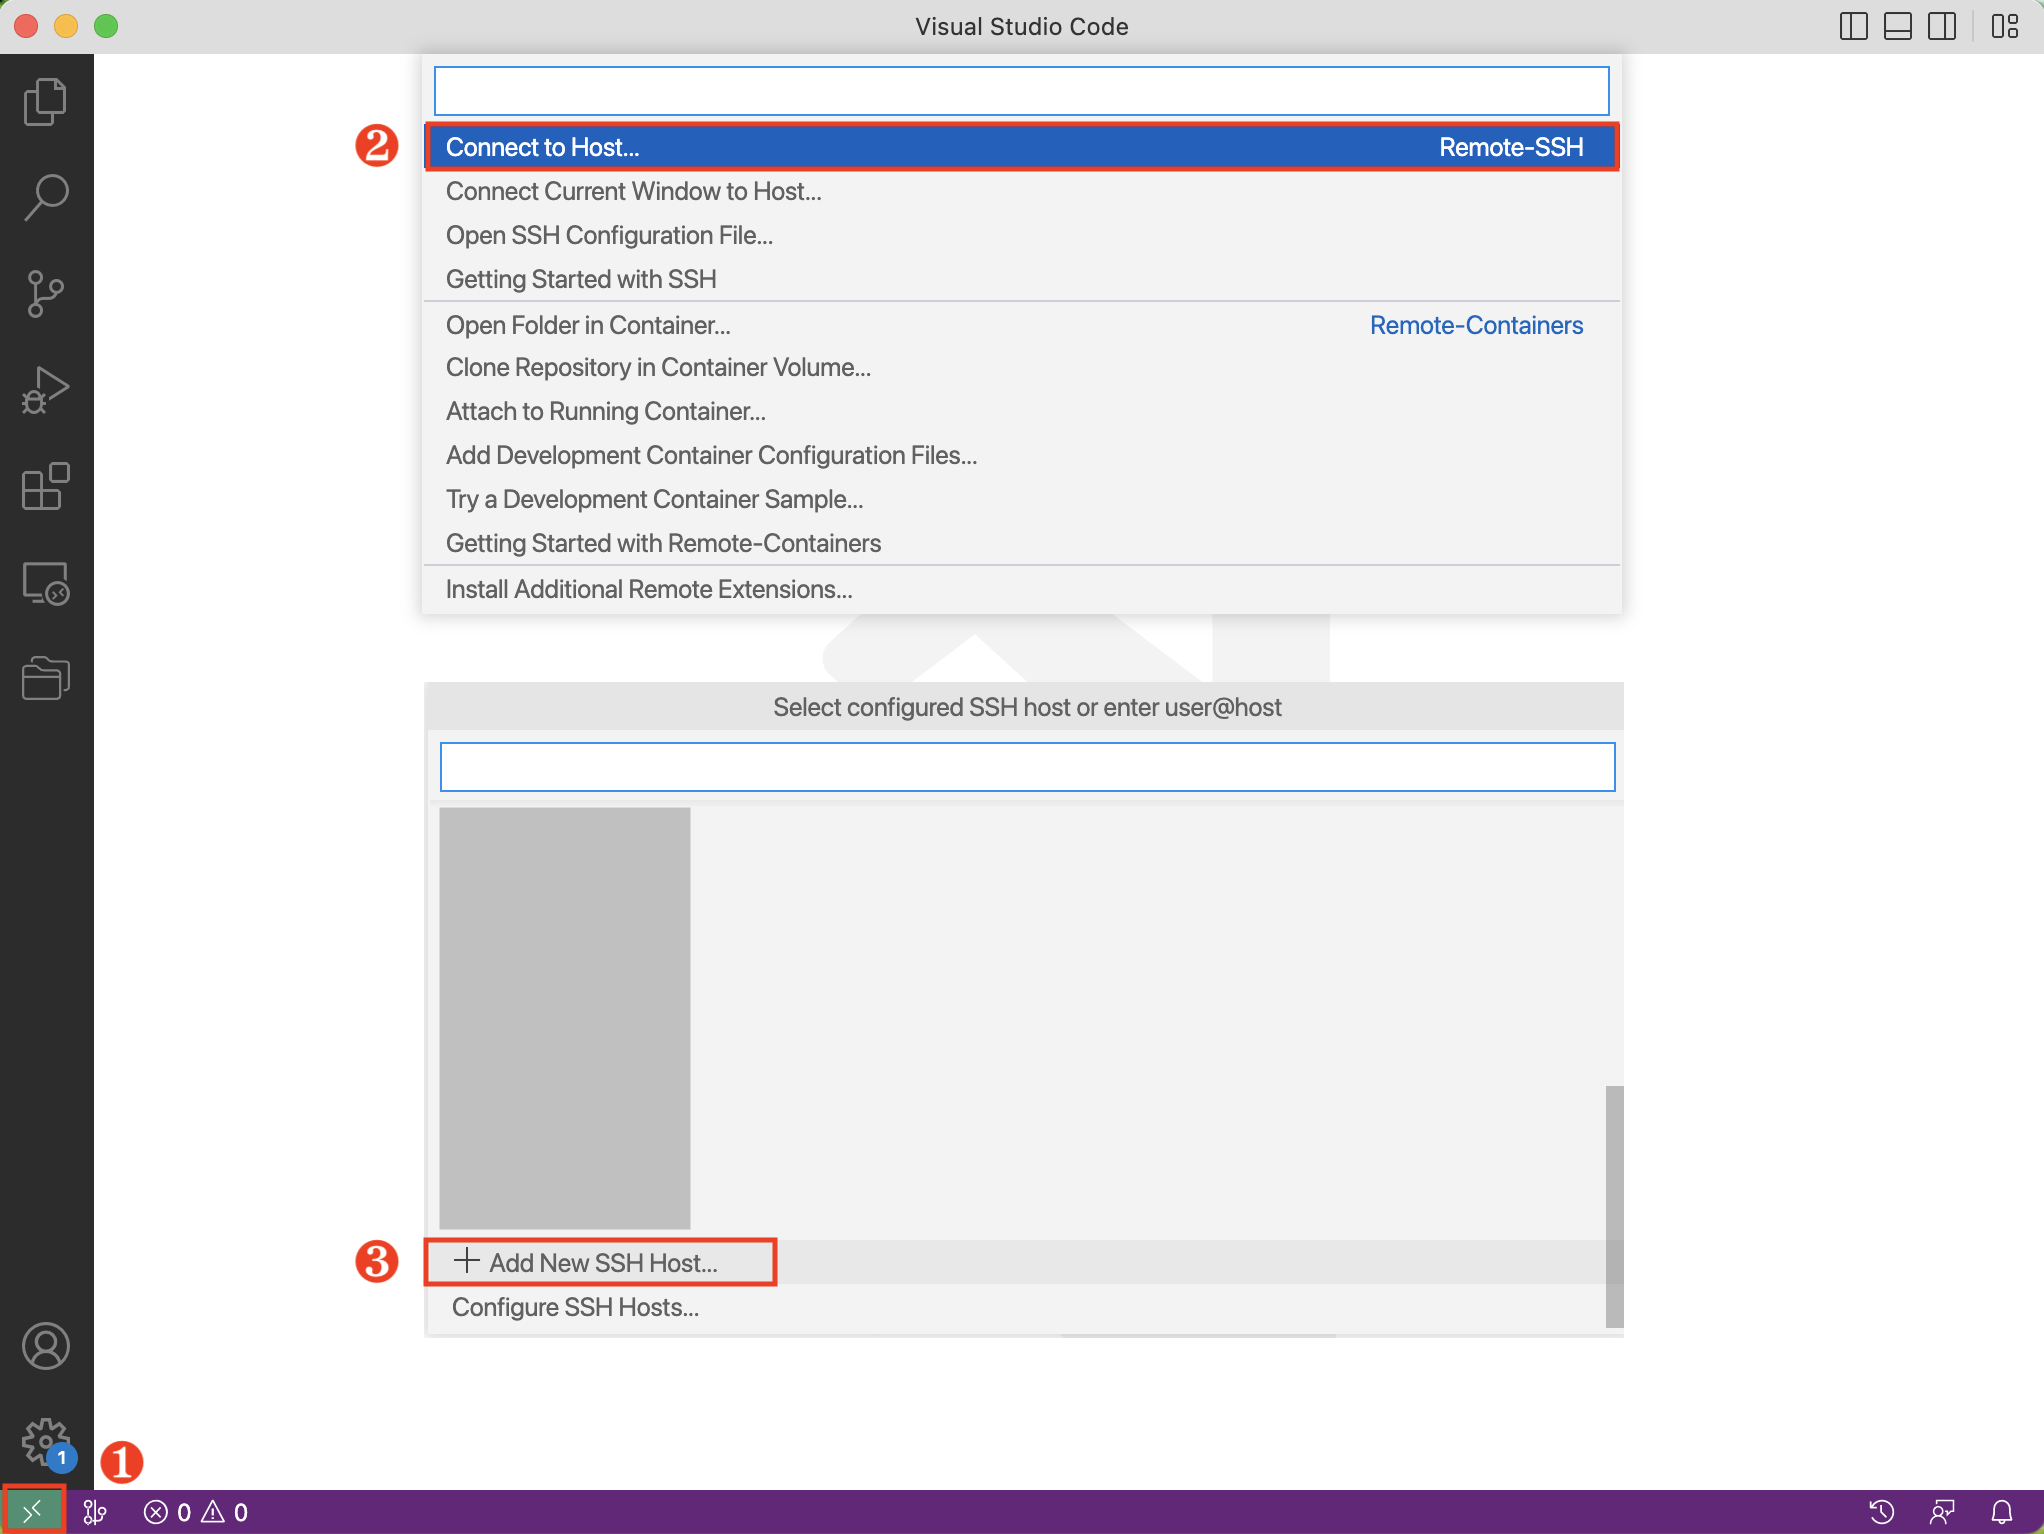
VSCode 提供了编辑 SSH Config 的方式。点击左下角的绿色 >< 符号,选择 Connect to Host,然后拉动滚动条到最下方,点击 Add New SSH Host:
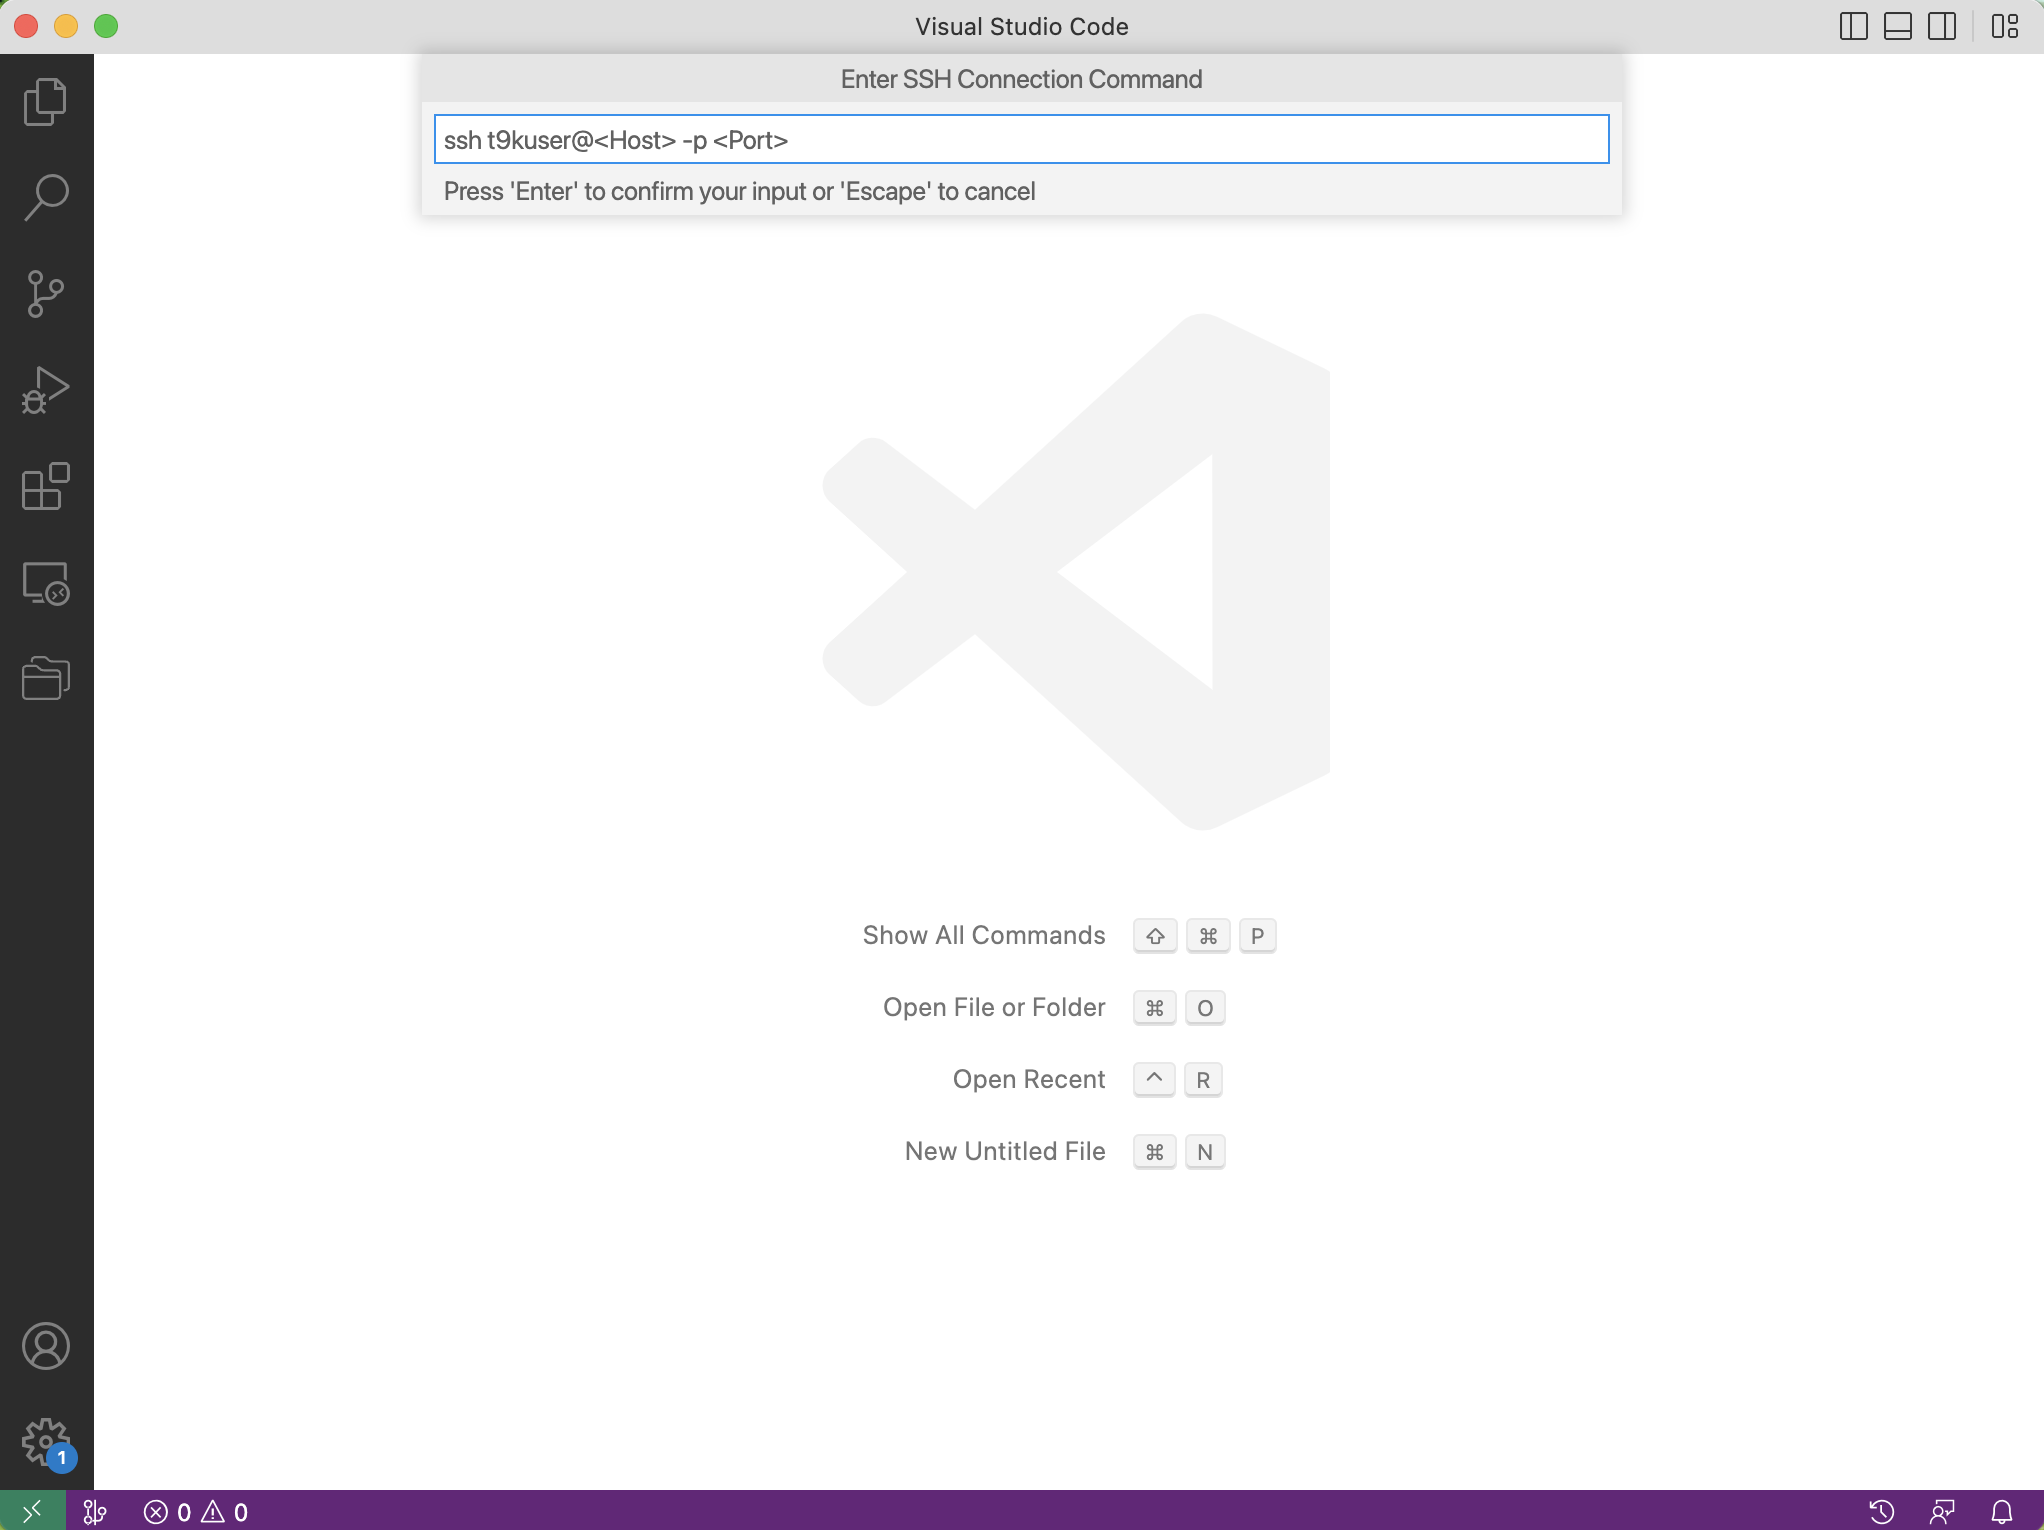
根据提示,输入以下内容,然后按下回车键(Enter):
ssh t9kuser@localhost -p <Port>
VSCode 会提示 Select SSH configuration file to update,第一个选择项通常是位于 $HOME/.ssh/config 的配置文件,你可以选择将主机的信息存储在第一个配置文件中。
连接到 Notebook
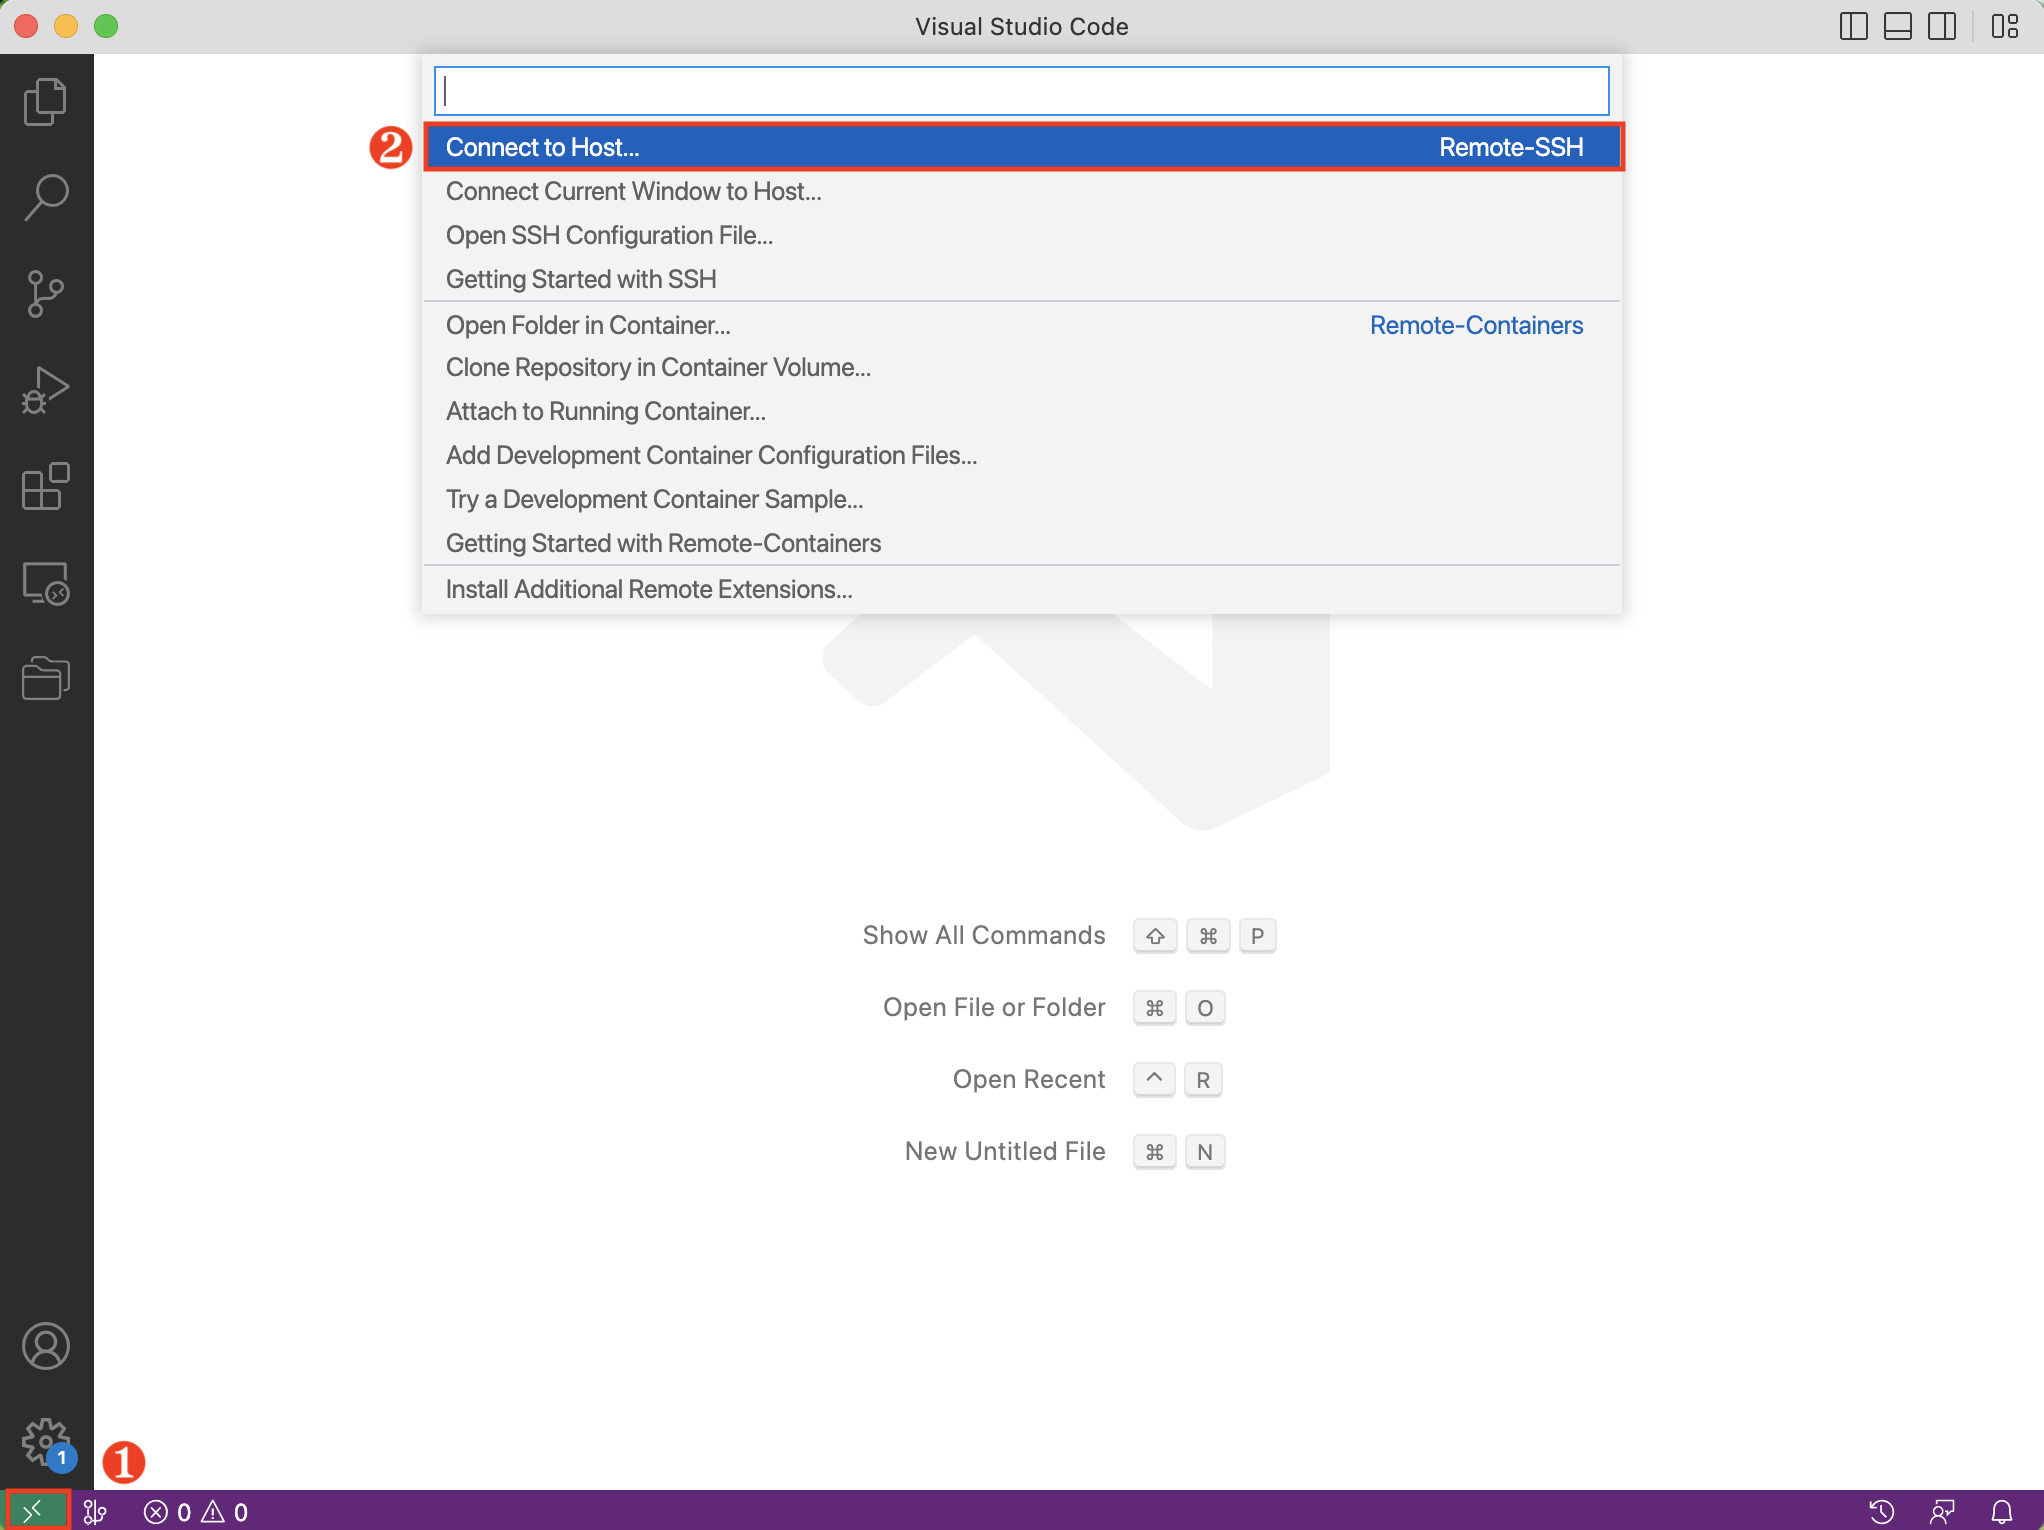
点击左下角的绿色 >< 符号,选择 Connect to Host:
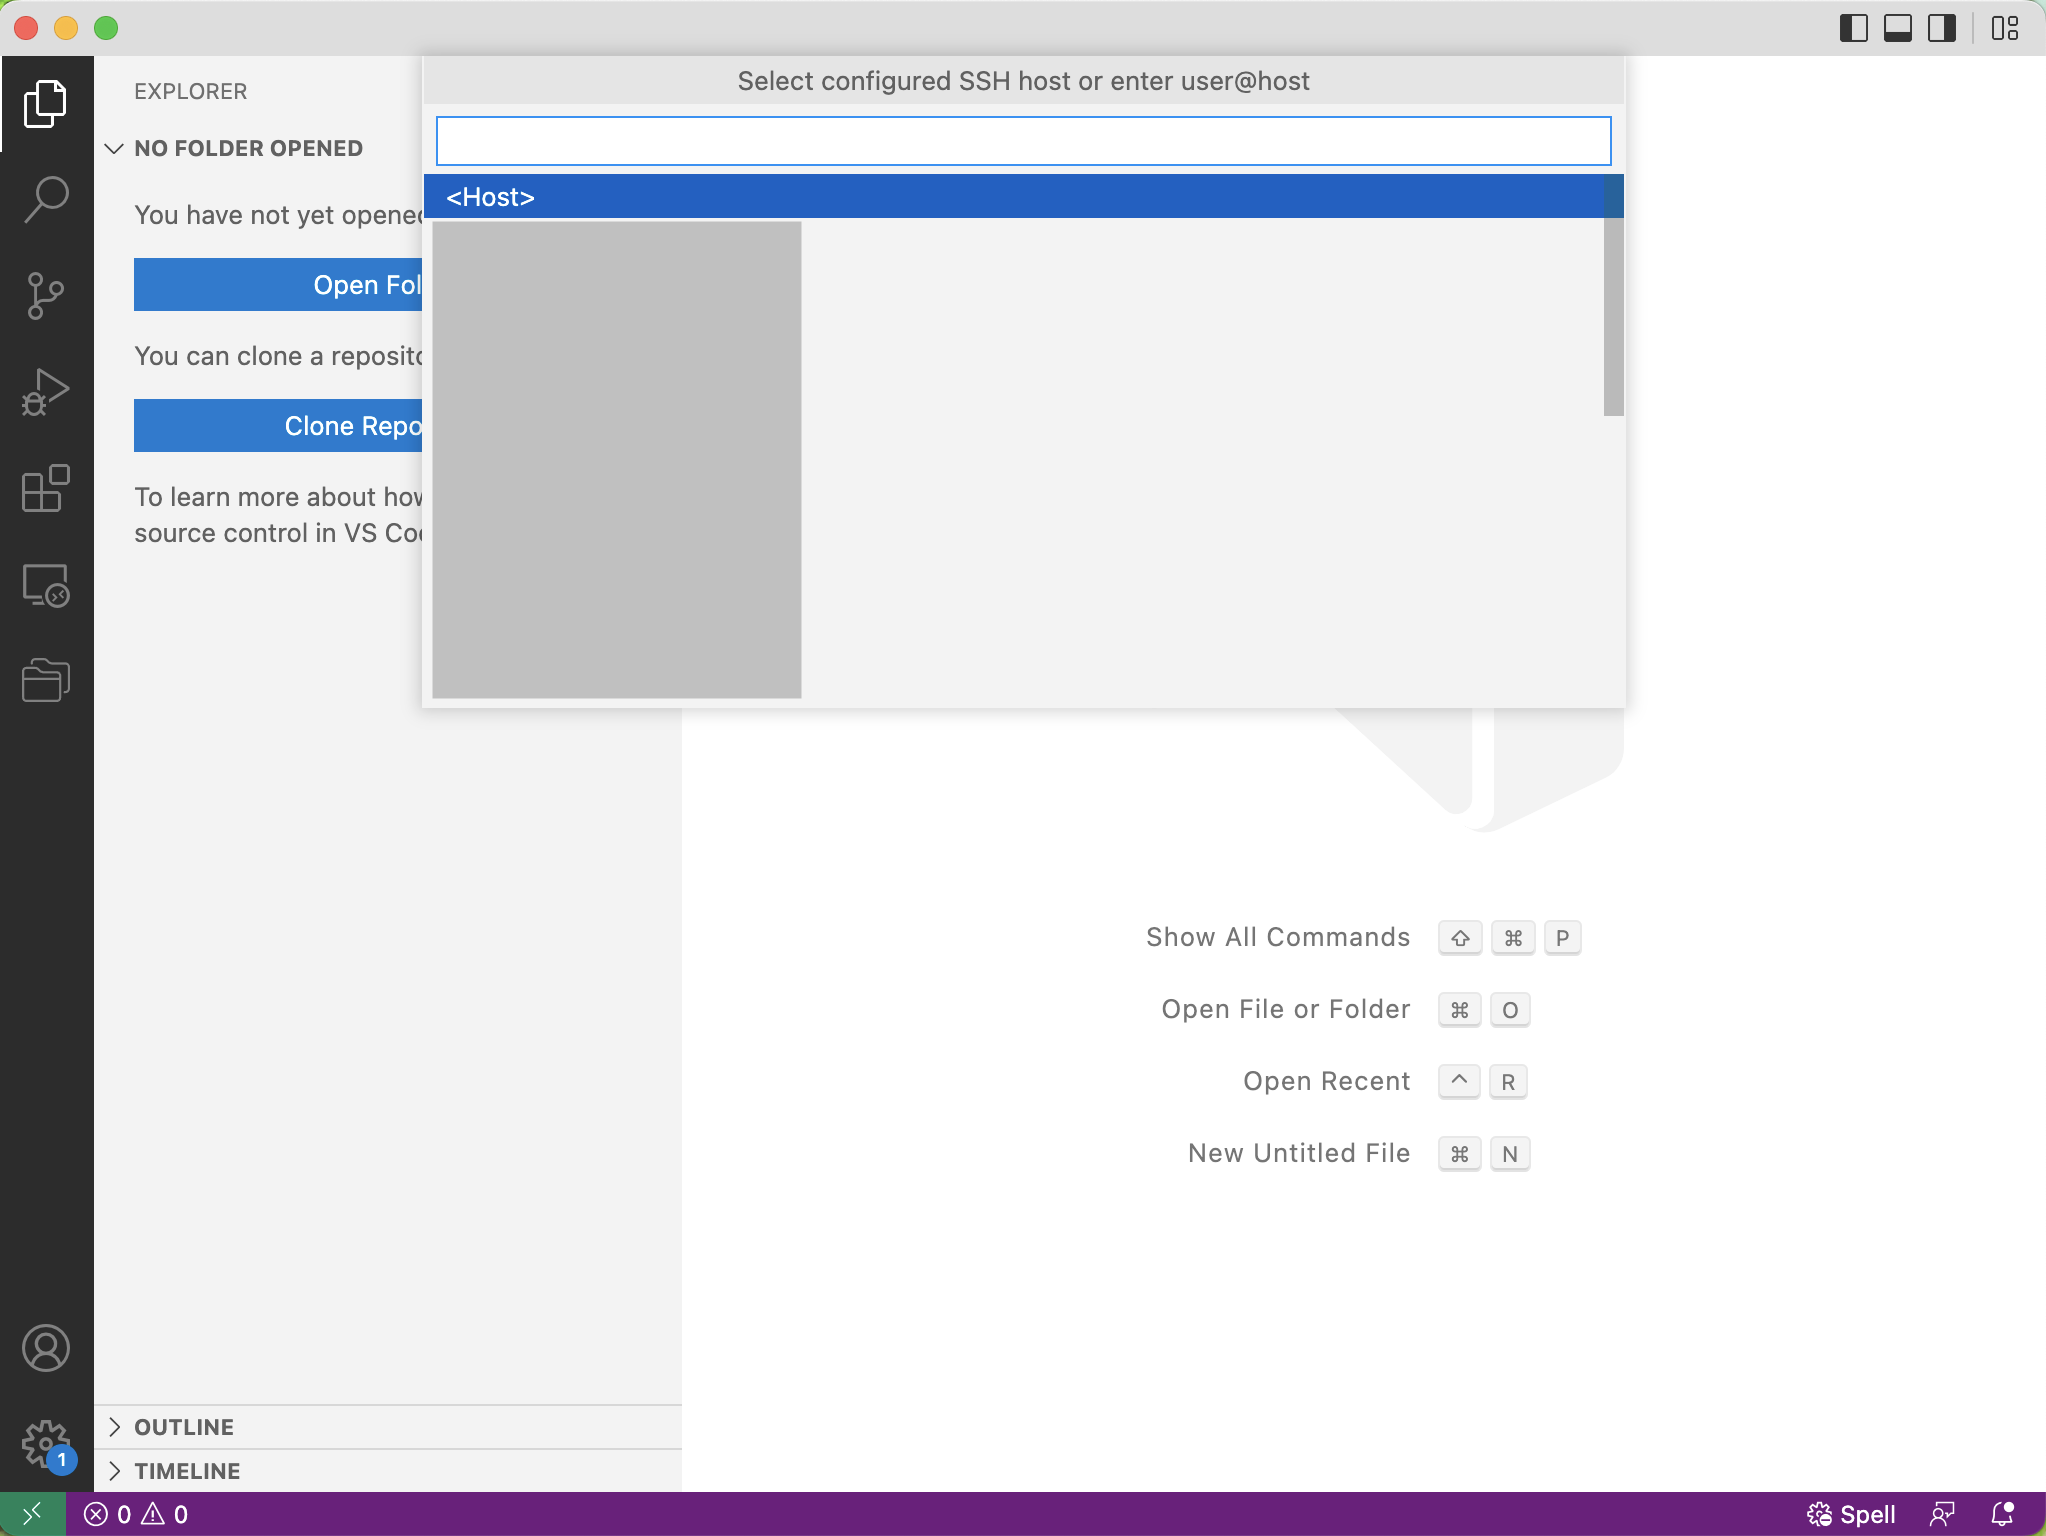
然后选择 SSH Config 中对应的主机名(使用上述配置方式时,主机名为 localhost):
VSCode 会新建一个窗口,等待连接建立之后,左下角会提示 SSH: Host。
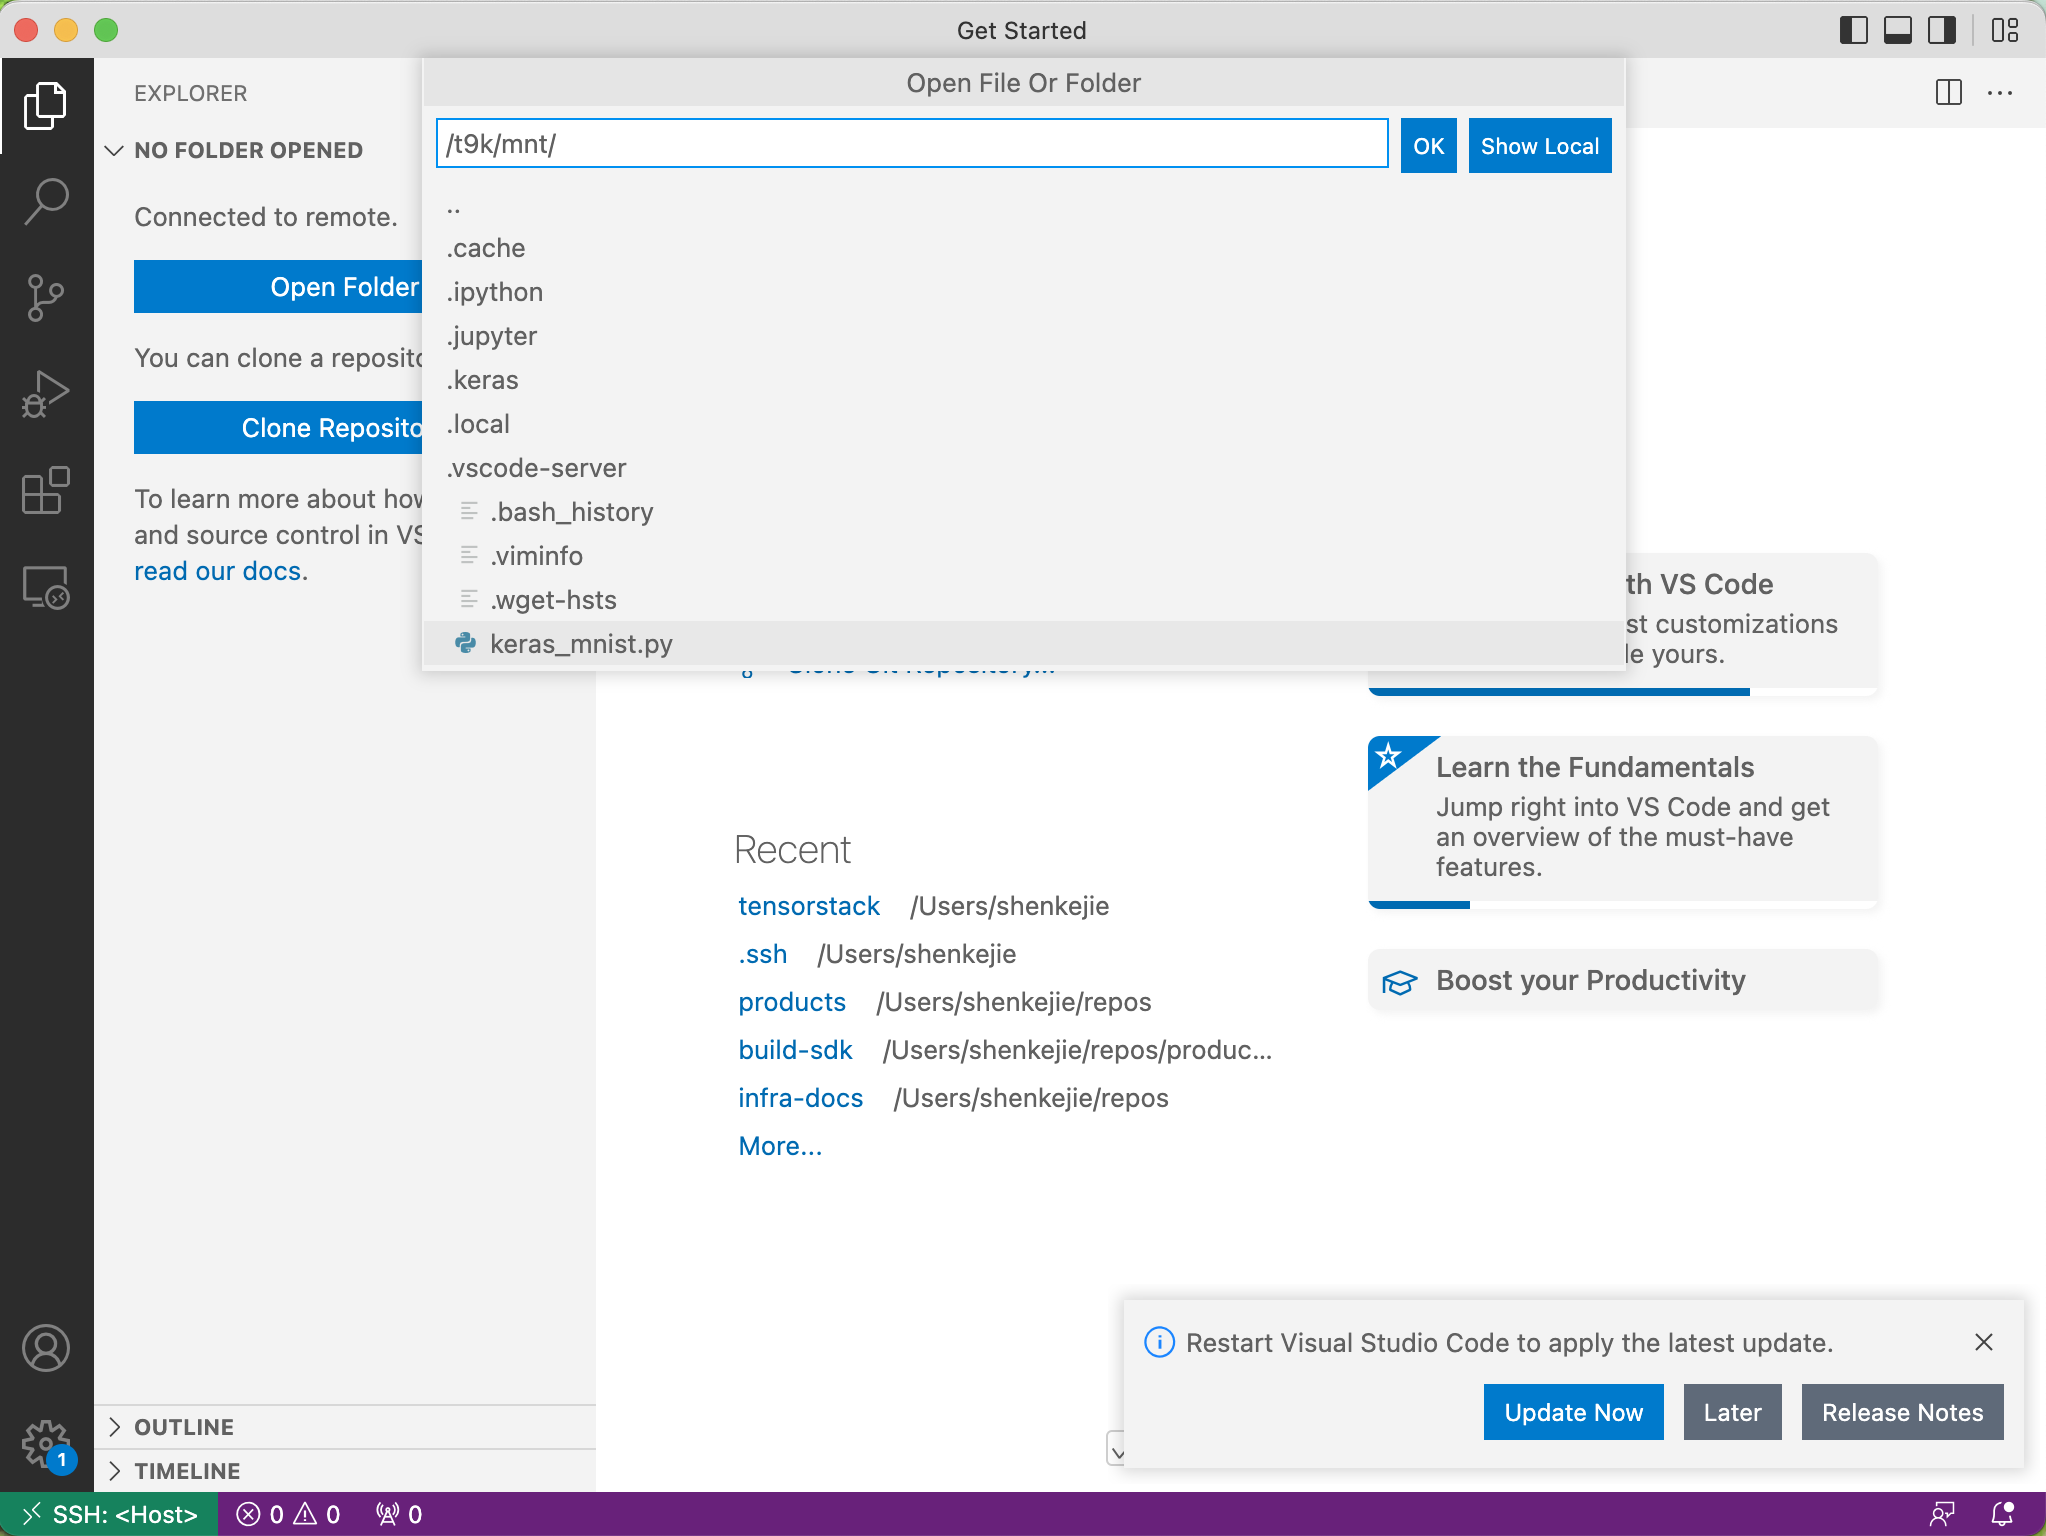
点击 Open Folder 可以选择打开的目录或者文件。你可以和本地开发一样使用 VSCode 来操作 Notebook:
使用 PyCharm
使用 PyCharm 远程连接到 Notebook 需要满足以下前提条件:
- 安装了 PyCharm 专业版,且版本不低于 2022.2。PyCharm 有专业版(Professional)和社区版(Community),目前仅 PyCharm Professional 支持远程 SSH 开发。
- Notebook 的资源配置至少为 3 个 CPU,3 GiB 内存,Notebook 绑定的持久卷至少有 2.5 GiB 的可用空间。推荐配置为至少 4 个 CPU,4 GiB 内存,5 GiB 持久卷。
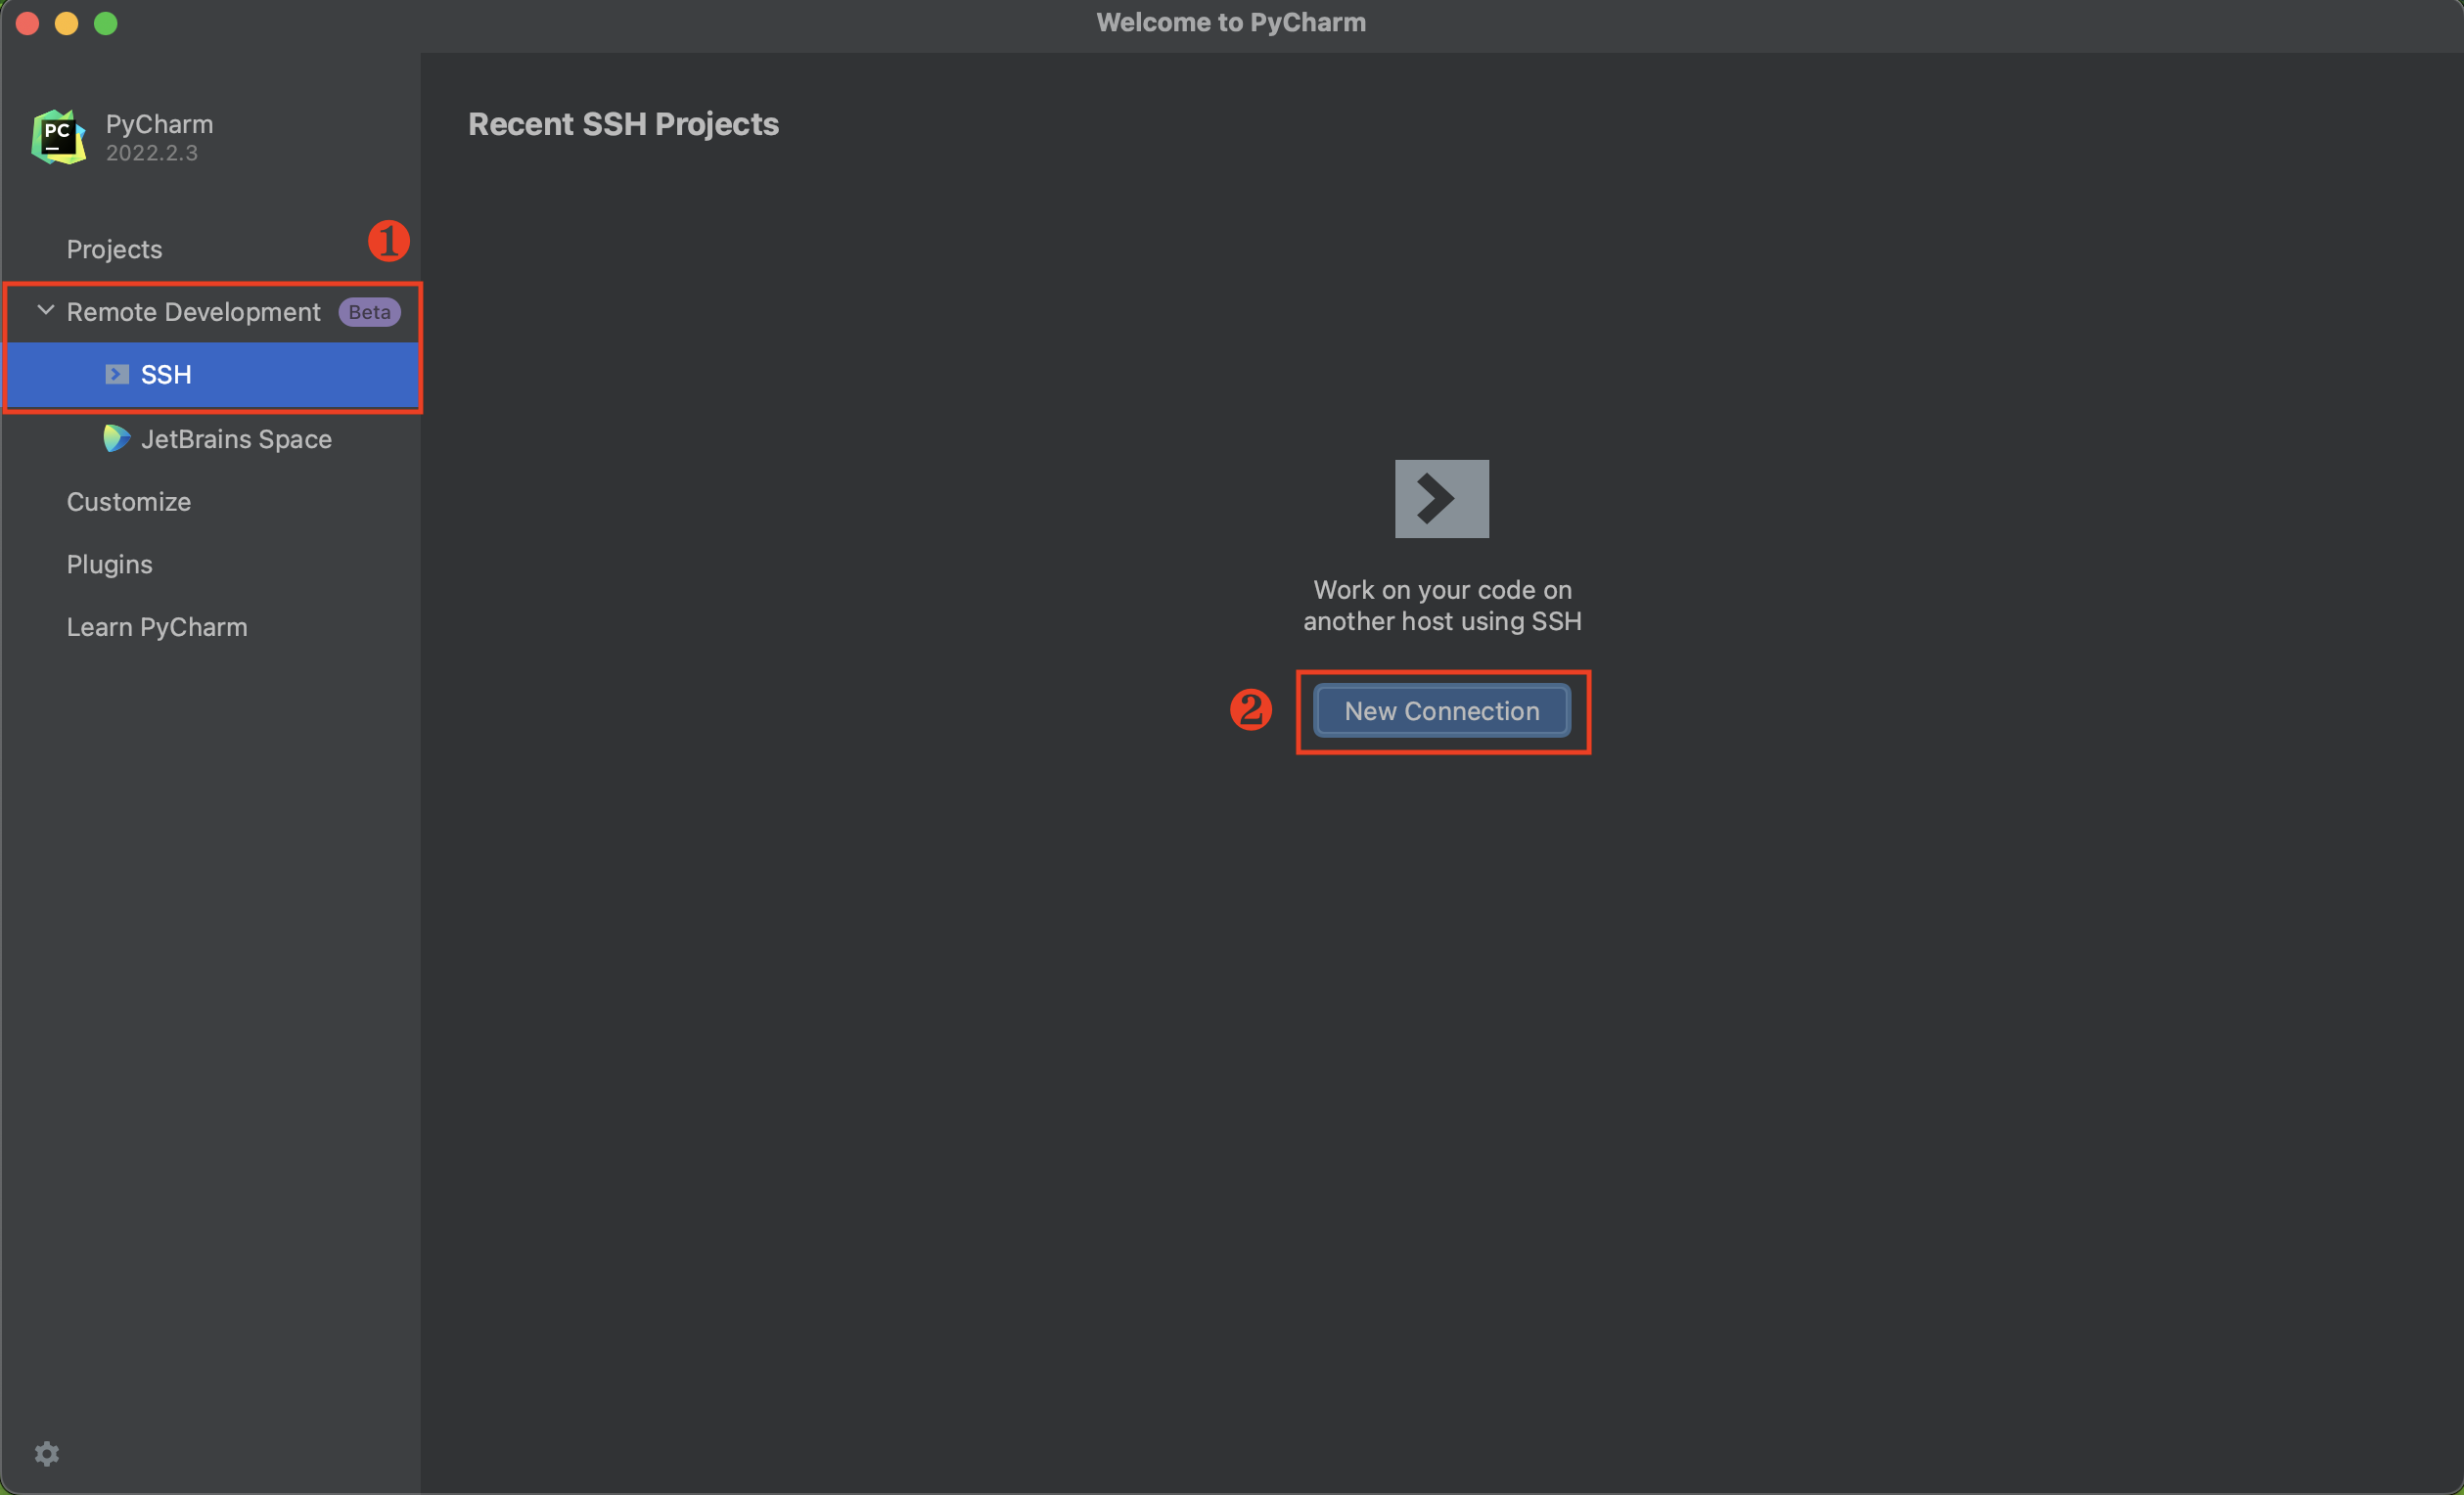
打开 PyCharm,在左侧的导航菜单中点击 Remote Development > SSH,然后点击右侧的 New Connection:
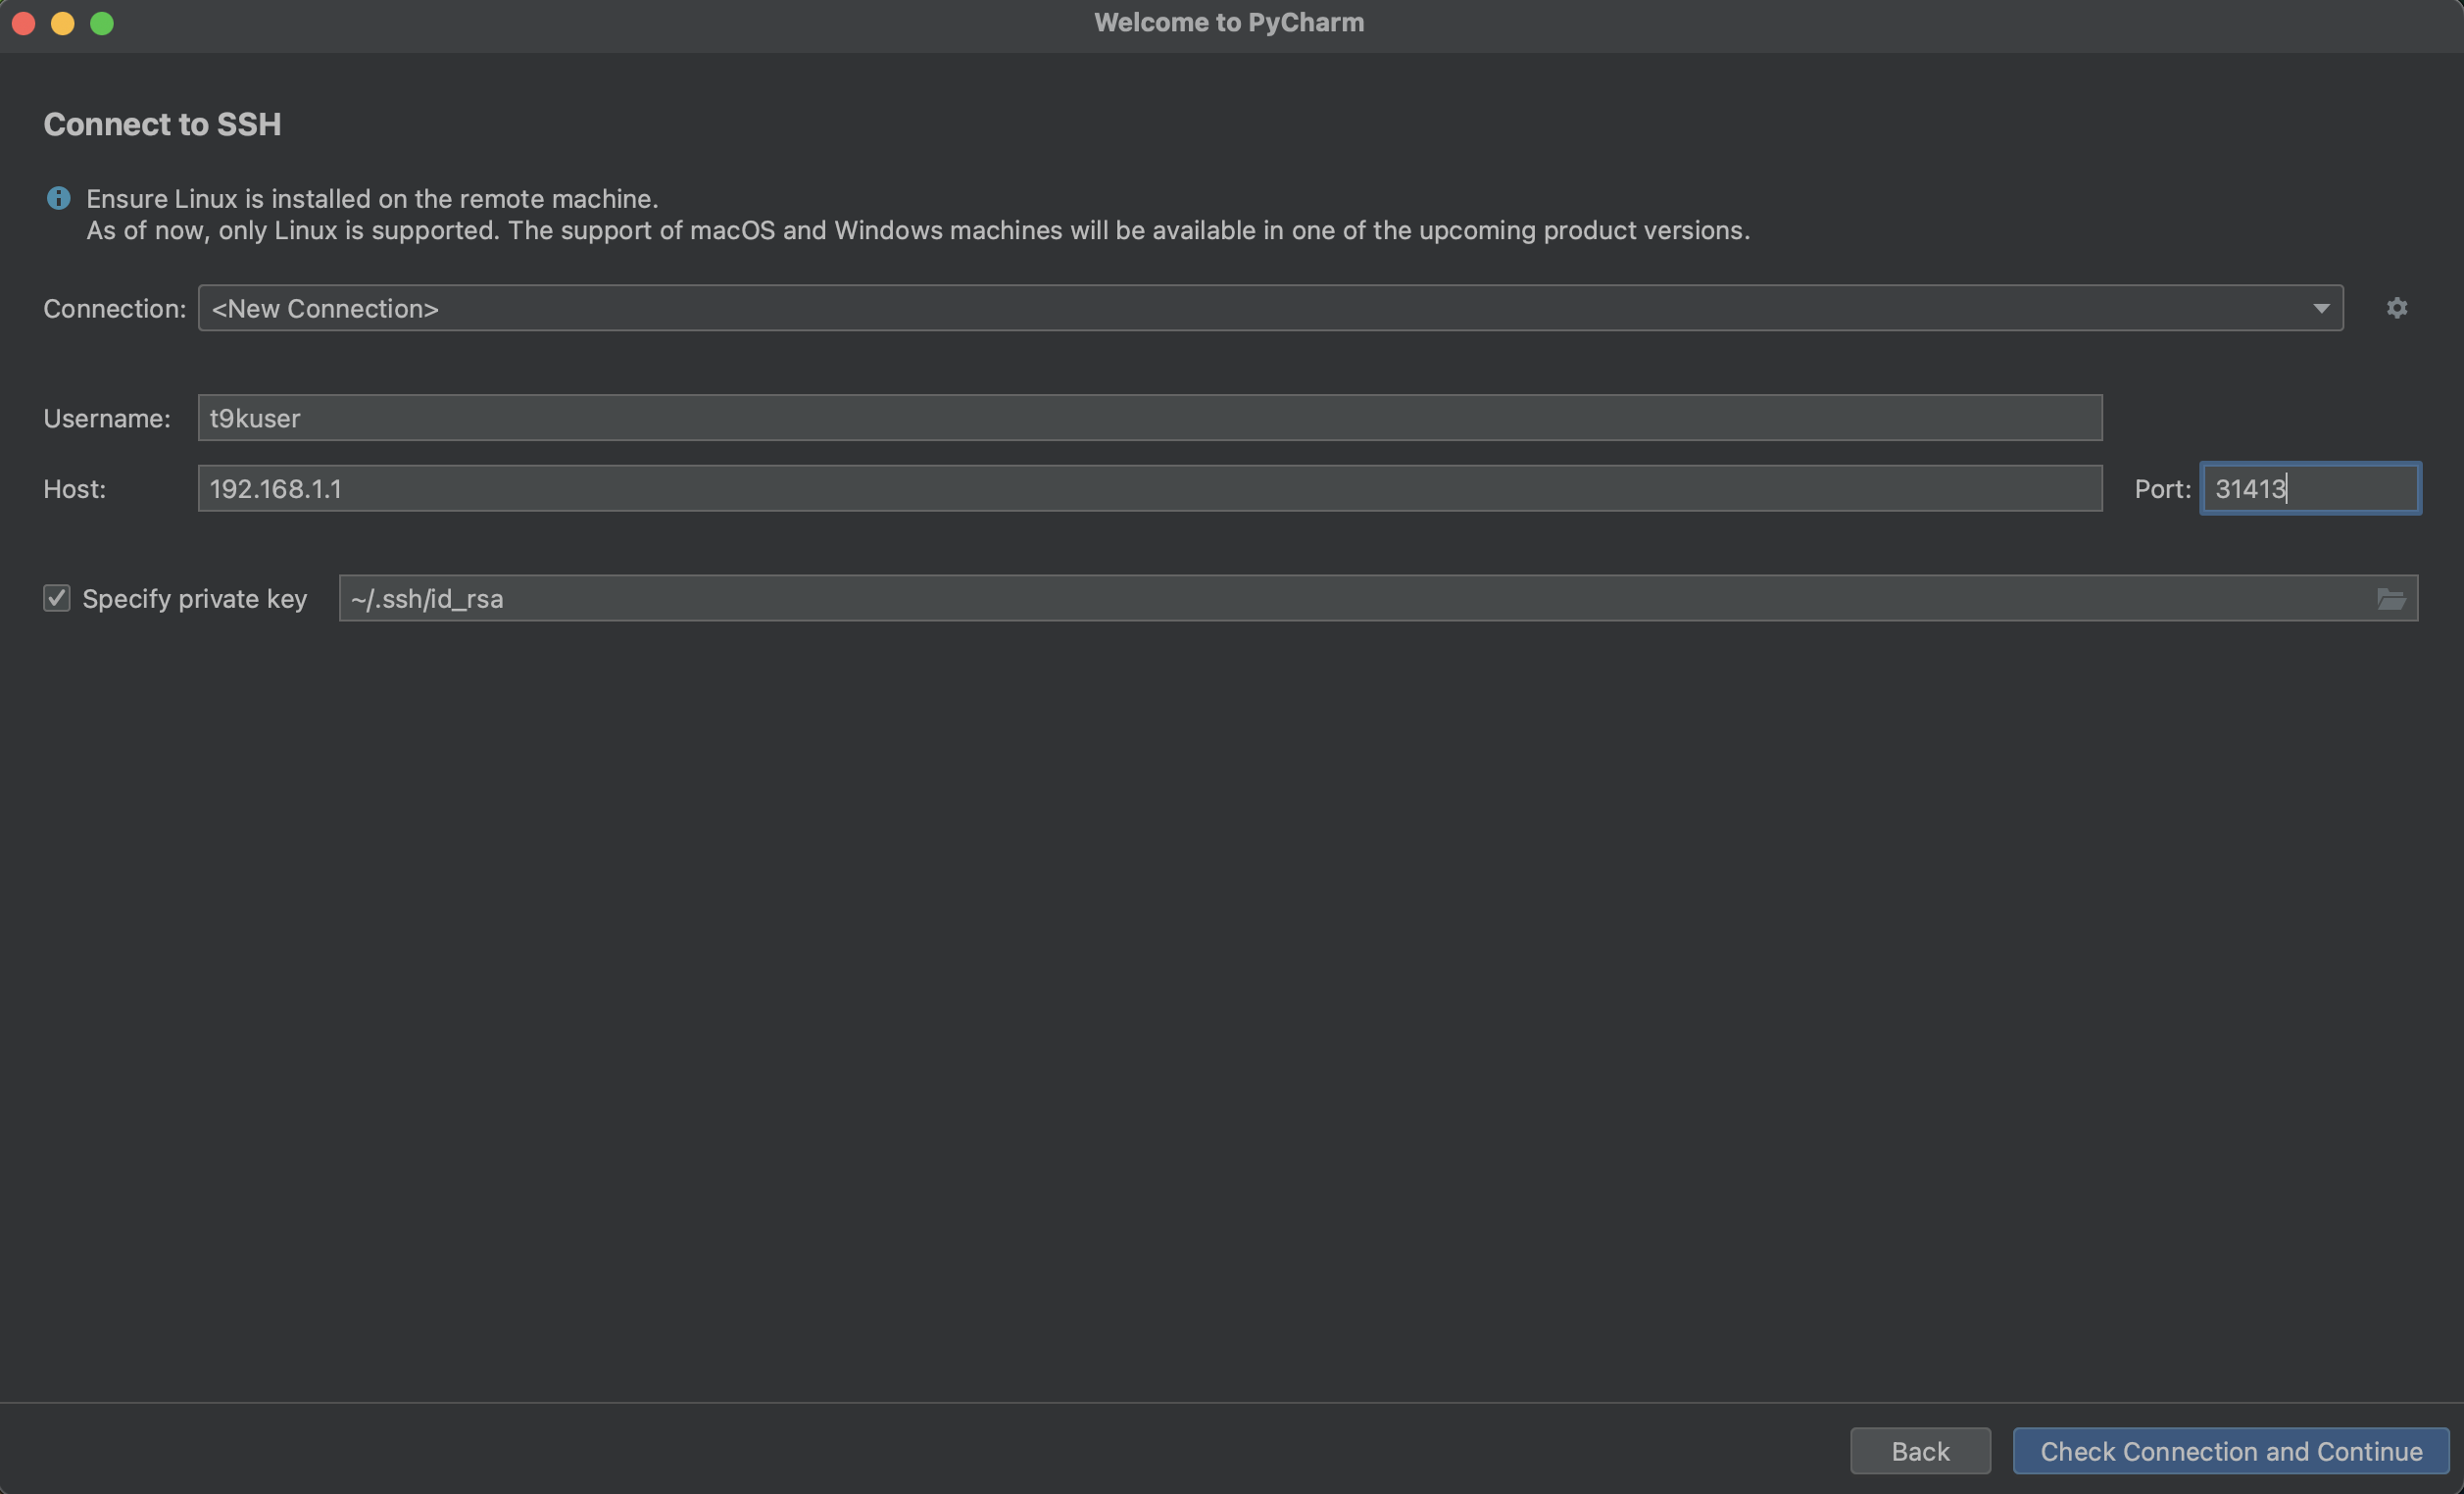
在弹出的对话框中填写如下参数:
Username:SSH 使用的用户名。Host:主机地址,通常为127.0.0.1。Port:端口。Specify private key:建议勾选,并选择与你上传的公钥对应的私钥。
点击 Check Connection and Continue,进入下一步:
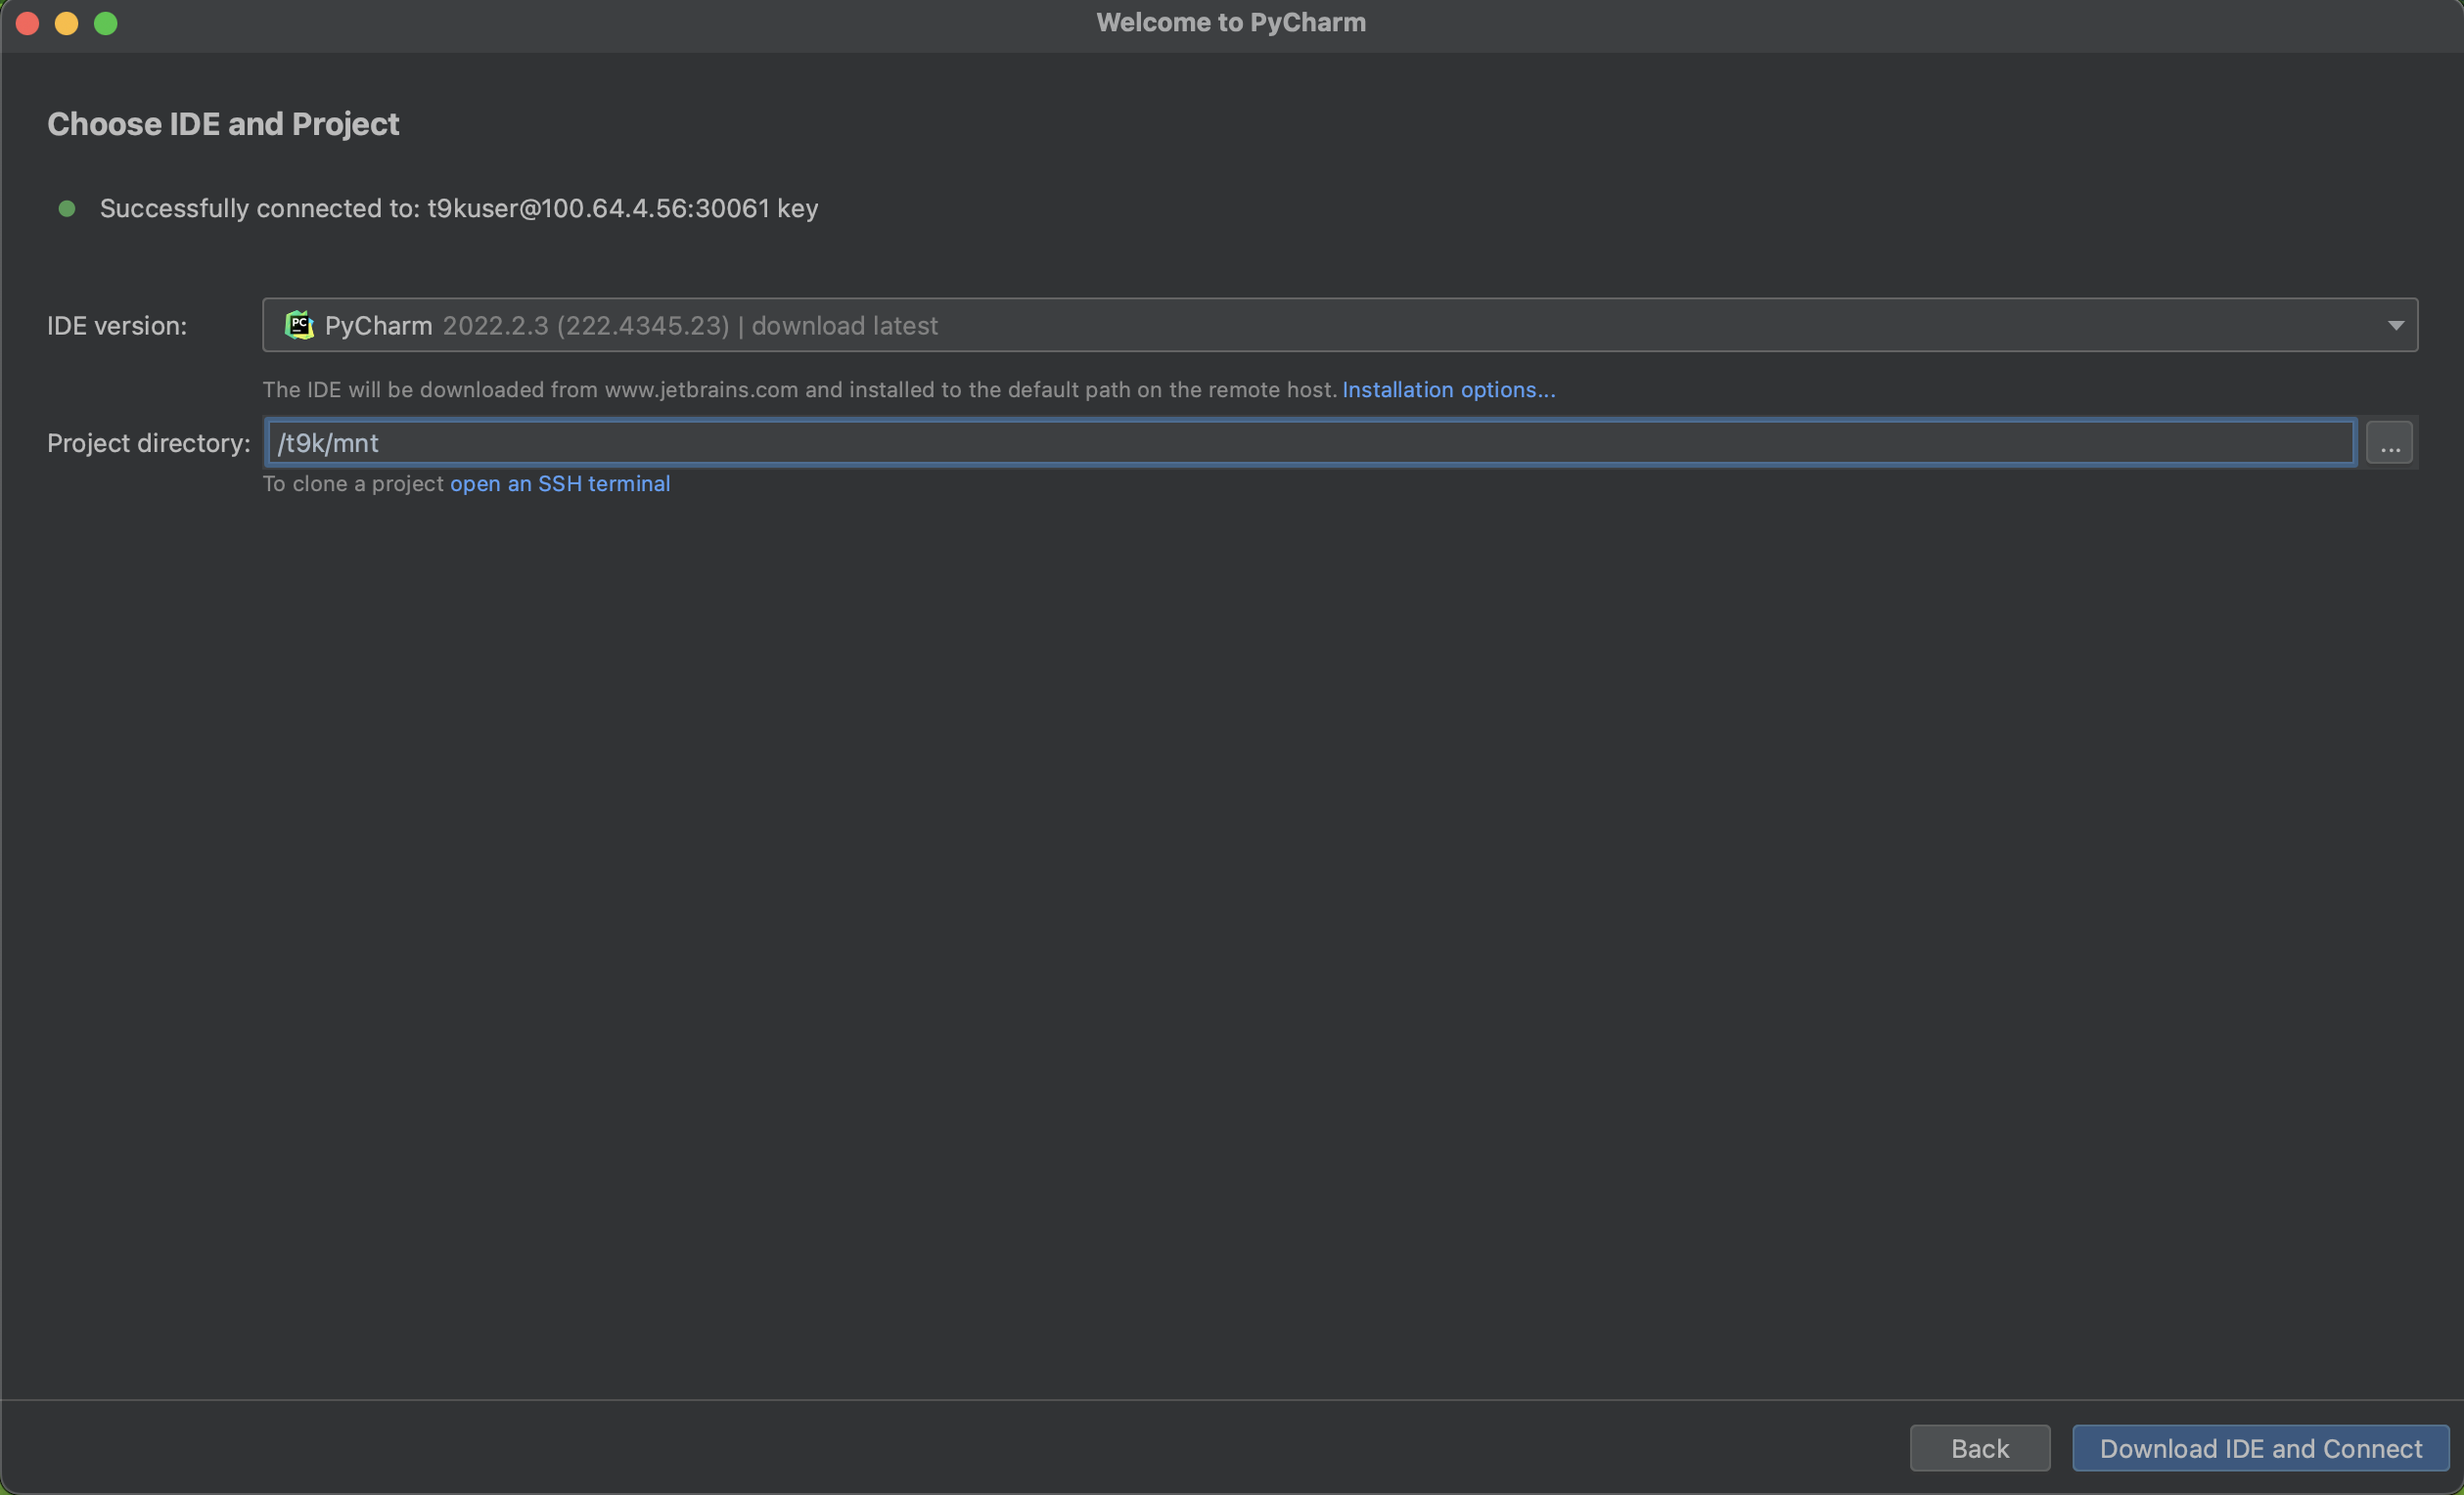
这里选择了在 Notebook 中安装的 IDE Backend 版本为 PyCharm 2022.2.3,远程打开的项目目录为 /t9k/mnt。点击 Download IDE and Connect 后,就可以通过 PyCharm 访问 Notebook 中的文件了。
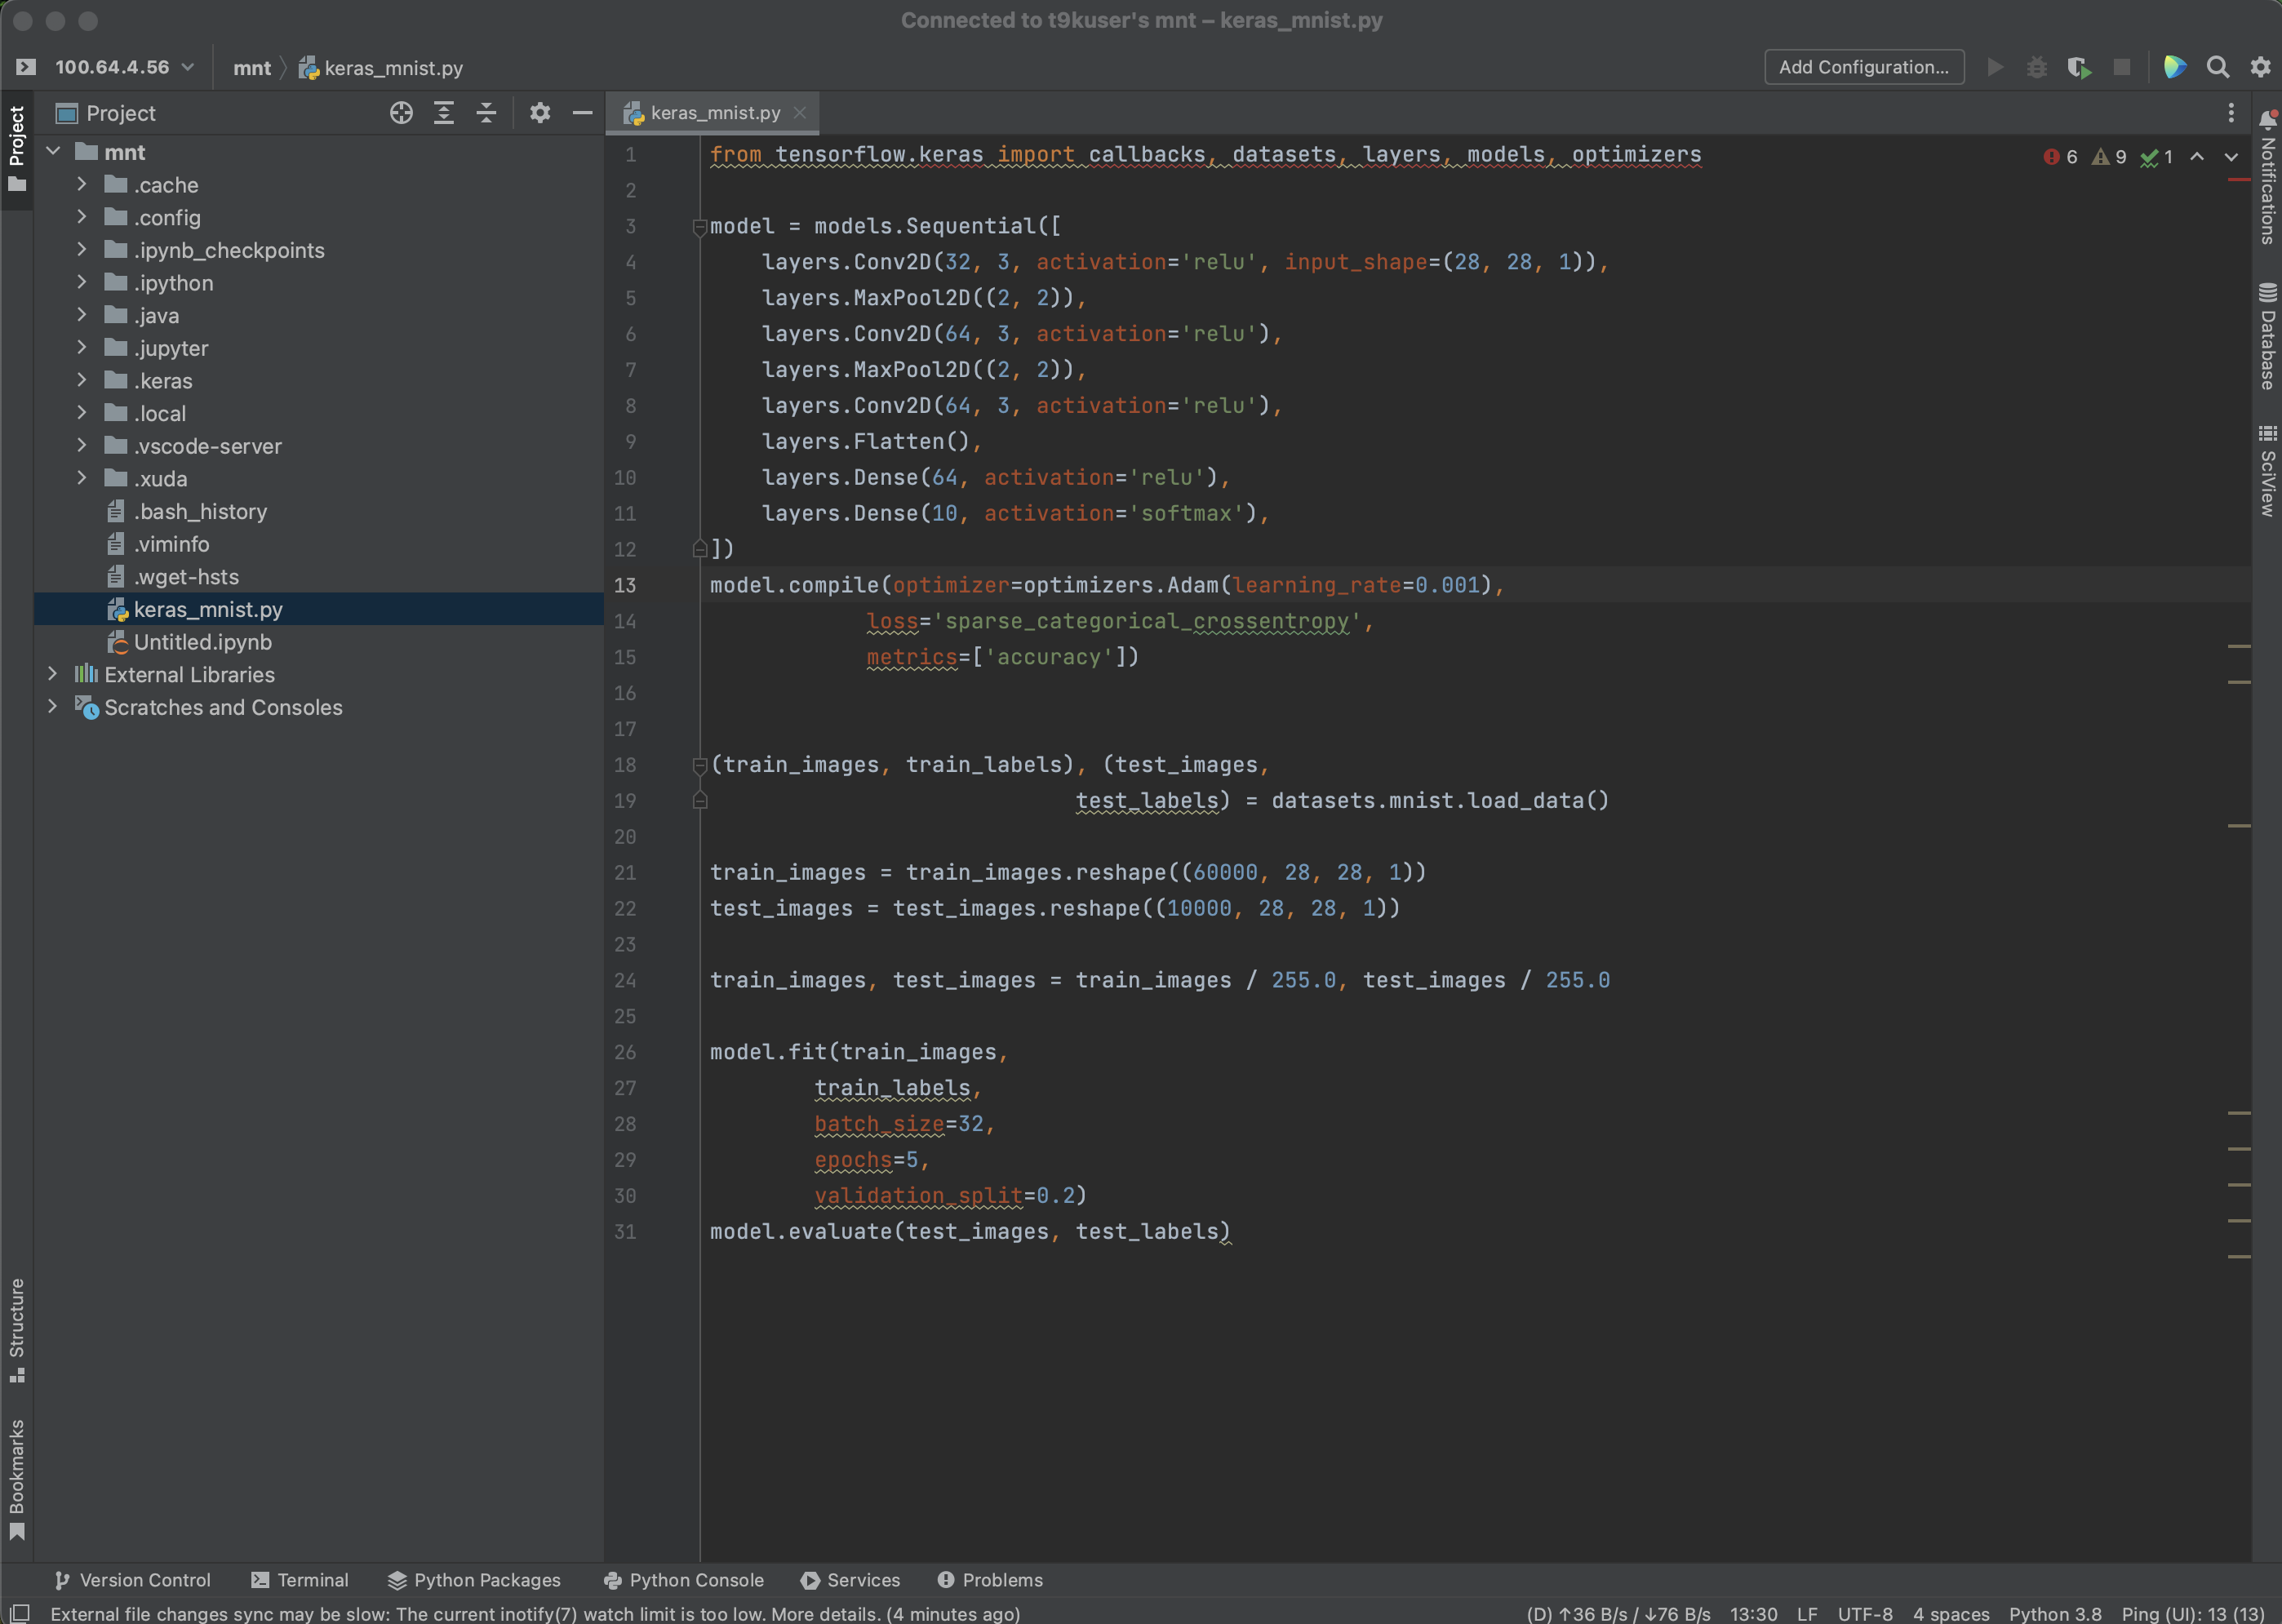
你可以和本地开发一样使用 PyCharm 来操作 Notebook: